

Introduction to Roboflow and Object Detection with AI
Enhancing Local Government Operations with Roboflow-Powered Object Detection.
-

- •


Introduction
This article will provide a tutorial on how to build a flexible, Roboflow-backed object-detection tool that helps to automatically detect and map key infrastructure elements from aerial or street-level imagery.
Potential Application for Local Government
Local Government Areas are designated regions within a state or territory, with a local council assigned the task of providing services and managing that region. They are primarily responsible for providing a wide range of local services and infrastructure within their defined areas. These include managing local roads, waste collection, parks and gardens, community facilities, and providing community services. They also play a role in town planning, building approvals, and environmental management. Object detection, the process of finding and labelling objects in images, is a key technology for streamlining local government operations. It helps lighten the manual load, ensures asset inventories remain up to date, and opens the door to more advanced spatial analytical capabilities.
Why Roboflow?
Computer vision models enable computers to "see" and interpret visual data like images and videos, allowing them to perform tasks like object detection, image classification, and facial recognition. Roboflow serves as a platform for developing and deploying these computer vision models.

Roboflow was launched in January 2020, providing everything you need to label, train, and deploy computer vision solutions. The creators experienced how tiring and slow it can be to train and deploy a computer vision model. There was always a need to write excessive code to format data. It was also very difficult to collaborate. Benchmarking the performance of different machine learning tools was very tedious as well. Thus, Roboflow was started so that everyone can have easy access to a computer vision model.
The platform is easy and intuitive to use, and there is a lot of flexibility in what can be achieved using their Public (Free) plan.
Driveway Detection using Roboflow
Step 1: Data Collection for Object Detection
For use cases such as car detection or tree detection, there are already plenty of datasets and models trained on cars or trees available on the platform. But, for a specific use case such as driveway detection, we will need to create a dataset and train a model on that dataset. For that, we need to first collect relevant images. If you already have access to aerial imagery from the local council GIS server or street-level photos captured with vehicle-mounted cameras, you can use a subset of the images for training.
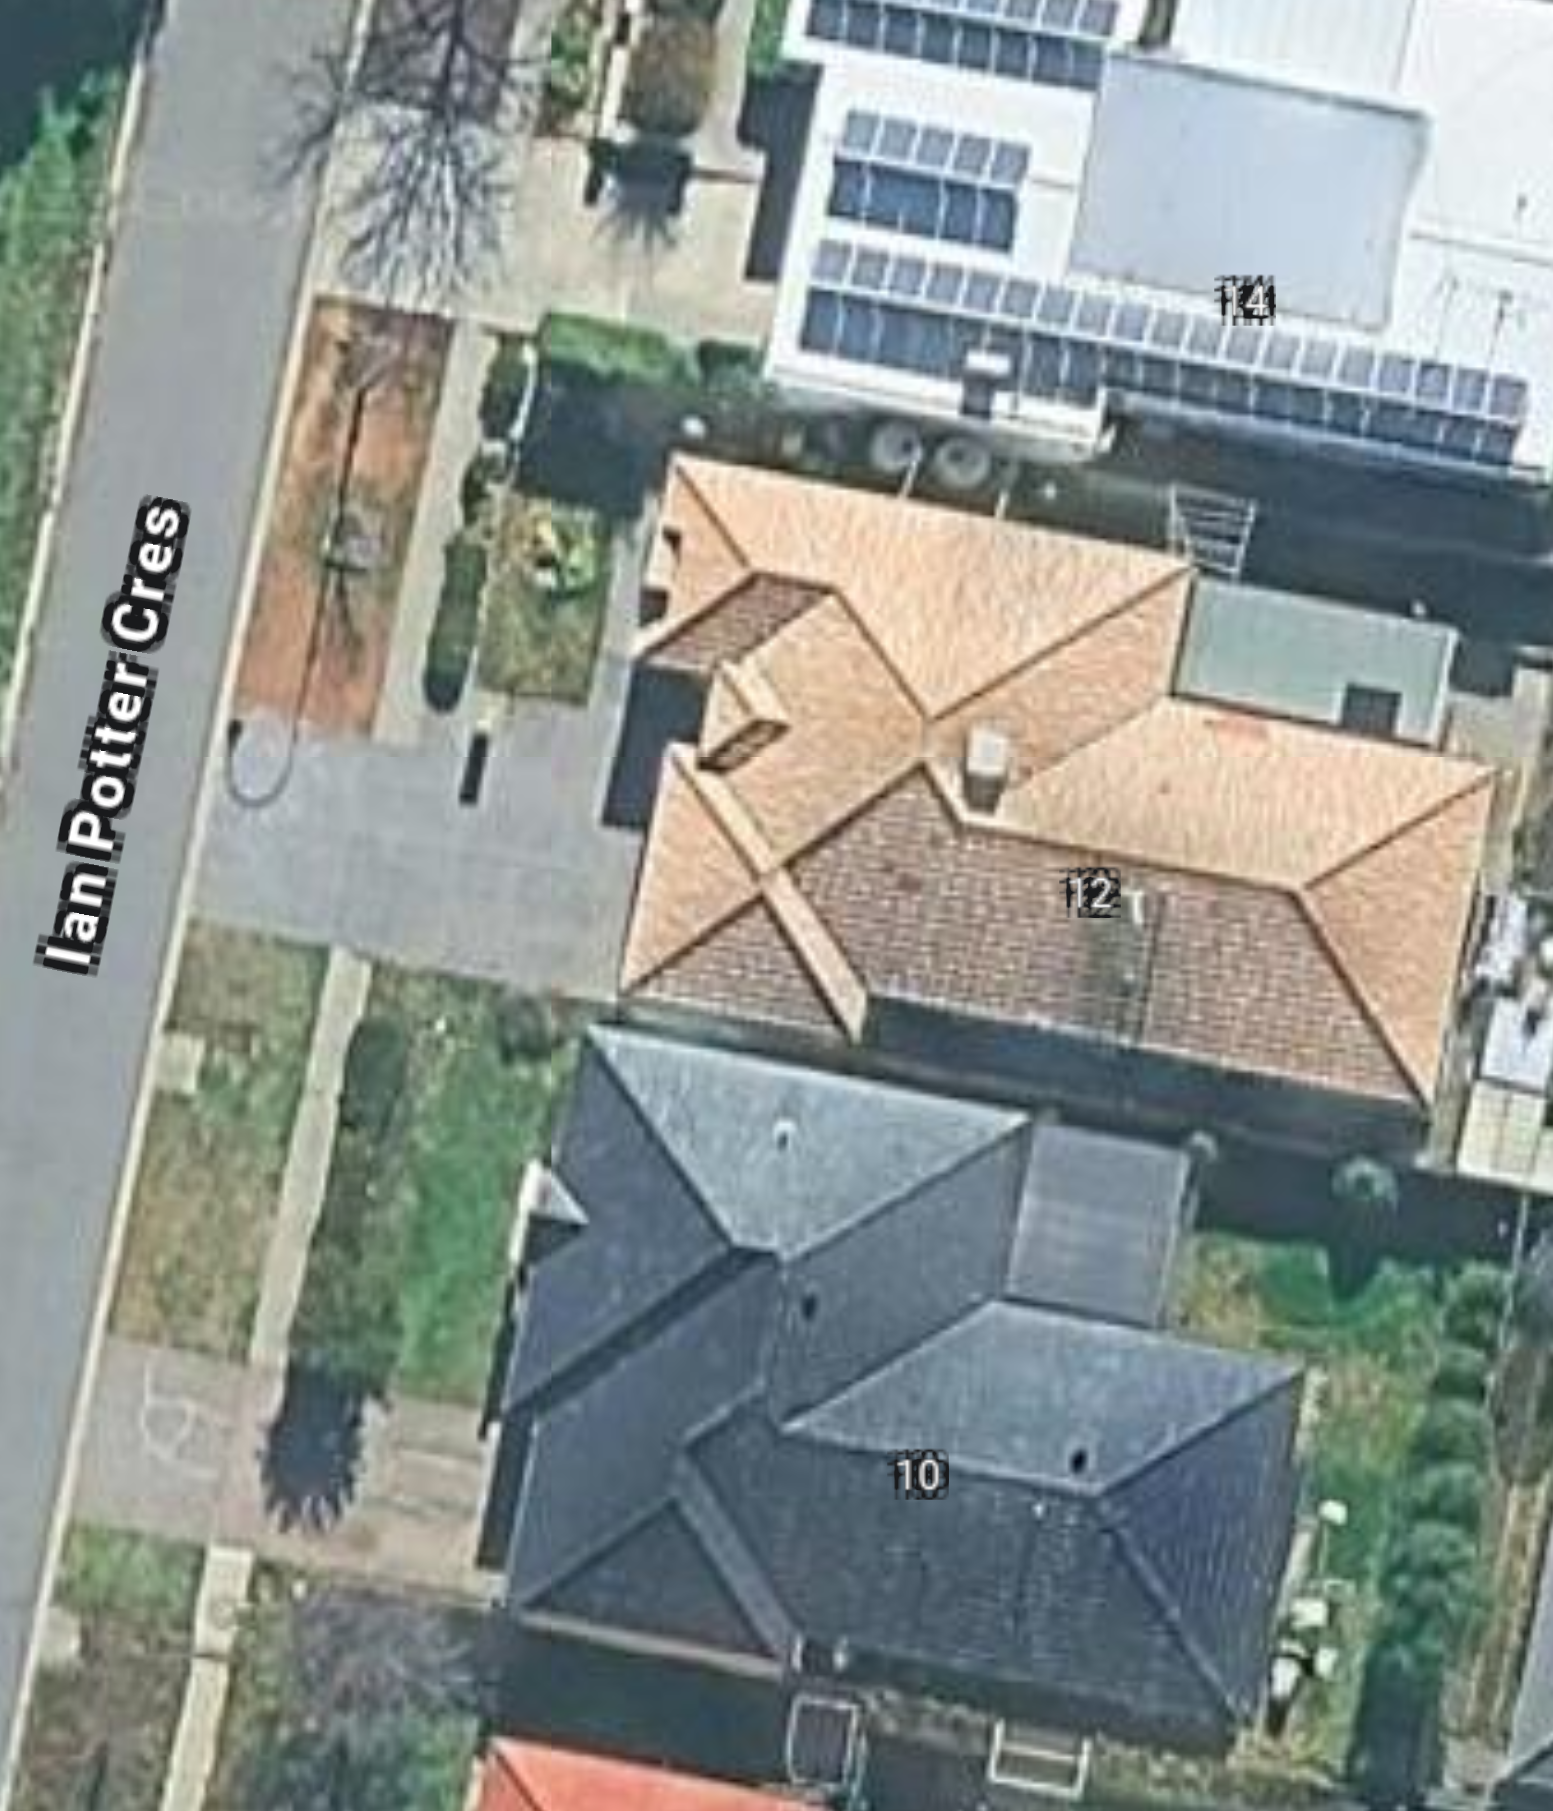
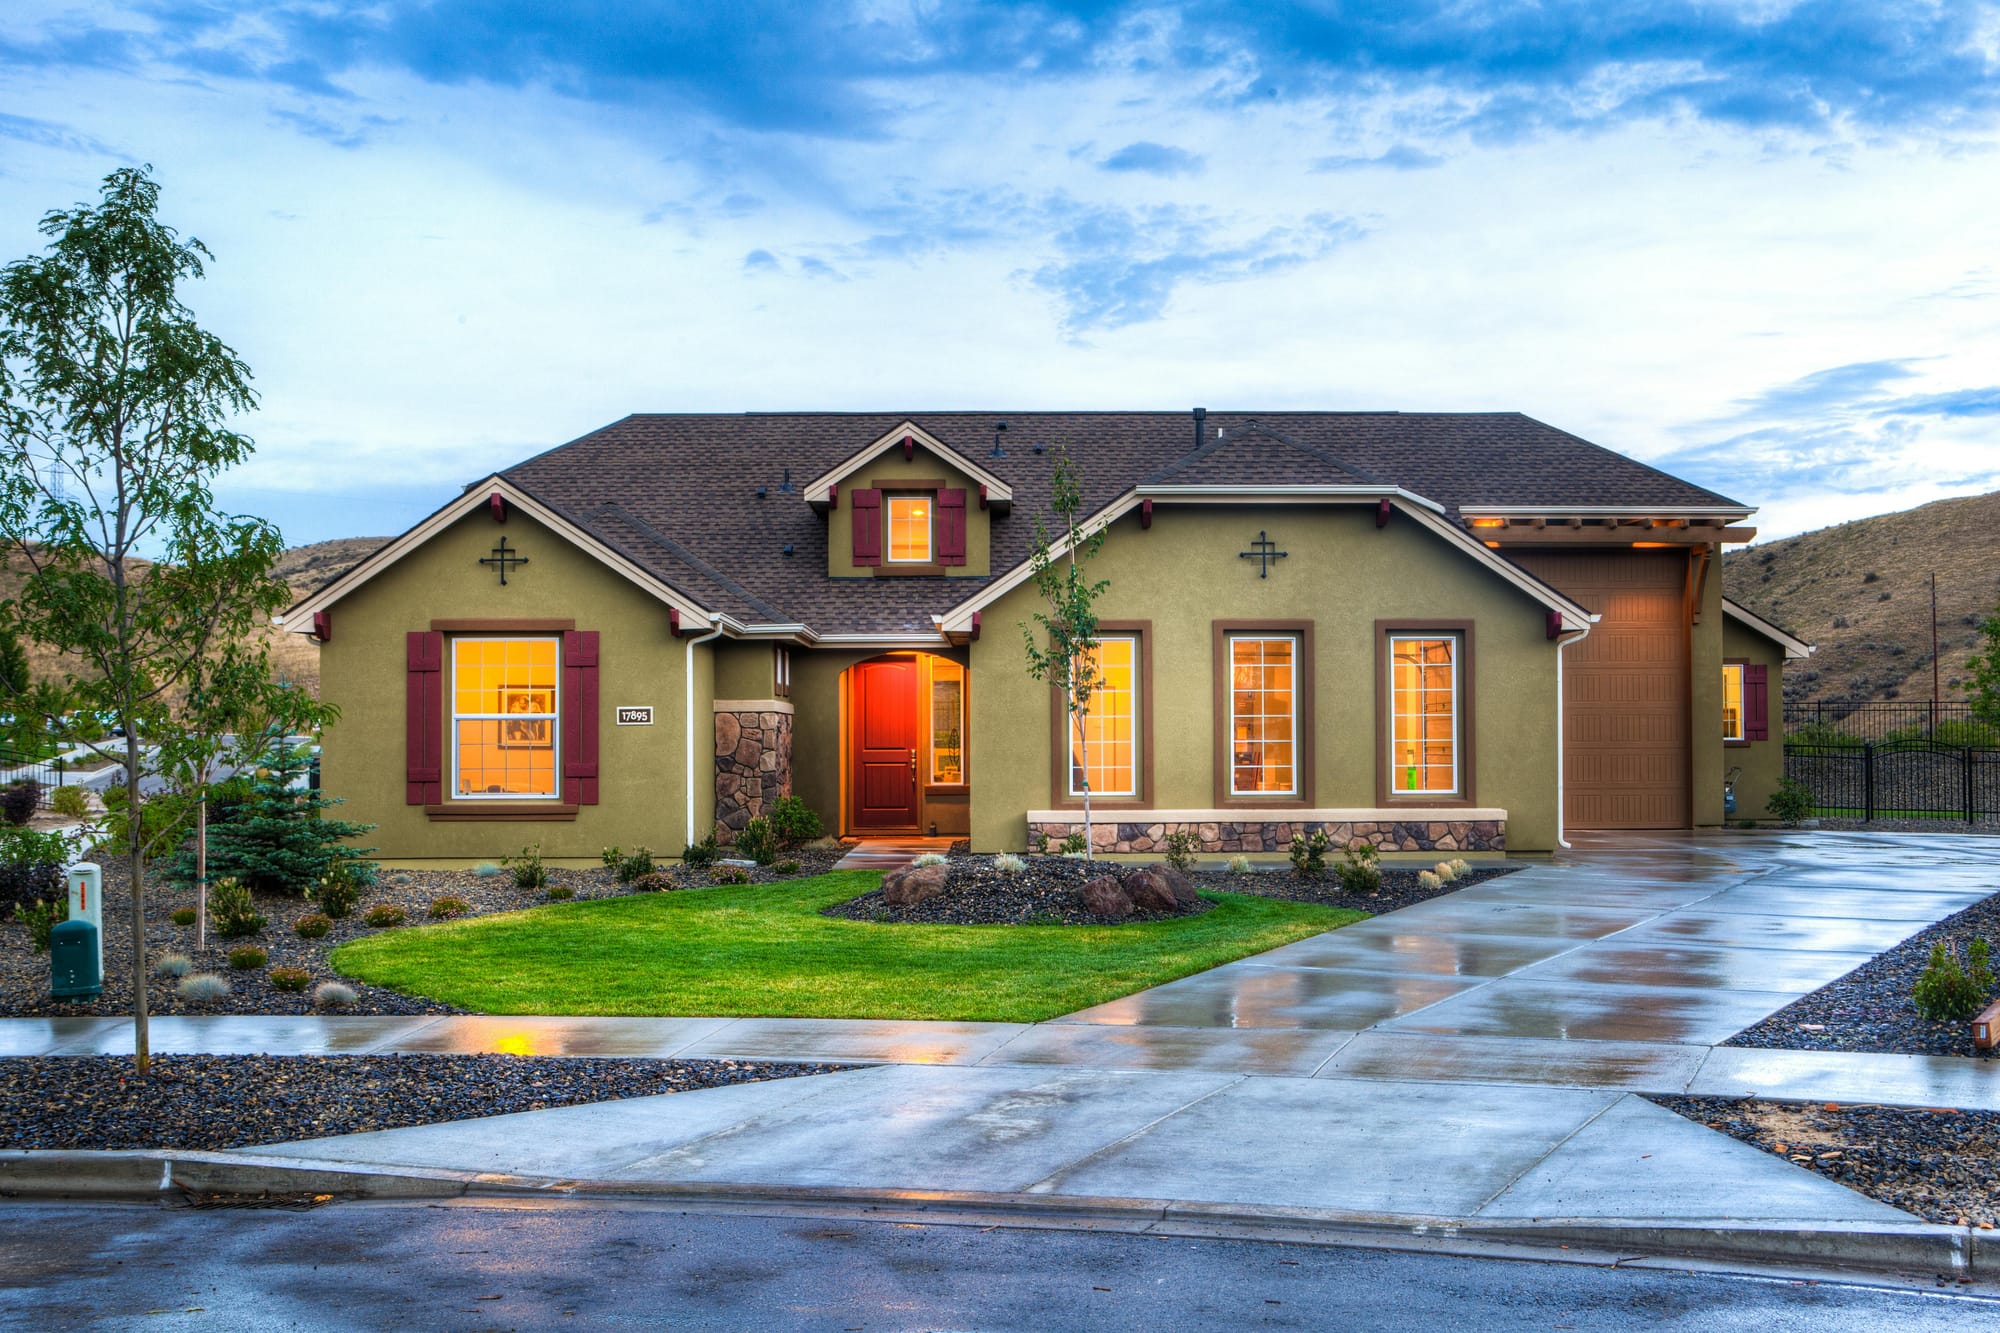
In this tutorial, we'll use screenshots of various suburbs obtained from Google Maps and high-resolution stock images obtained from Unsplash.com or Pexels.com.
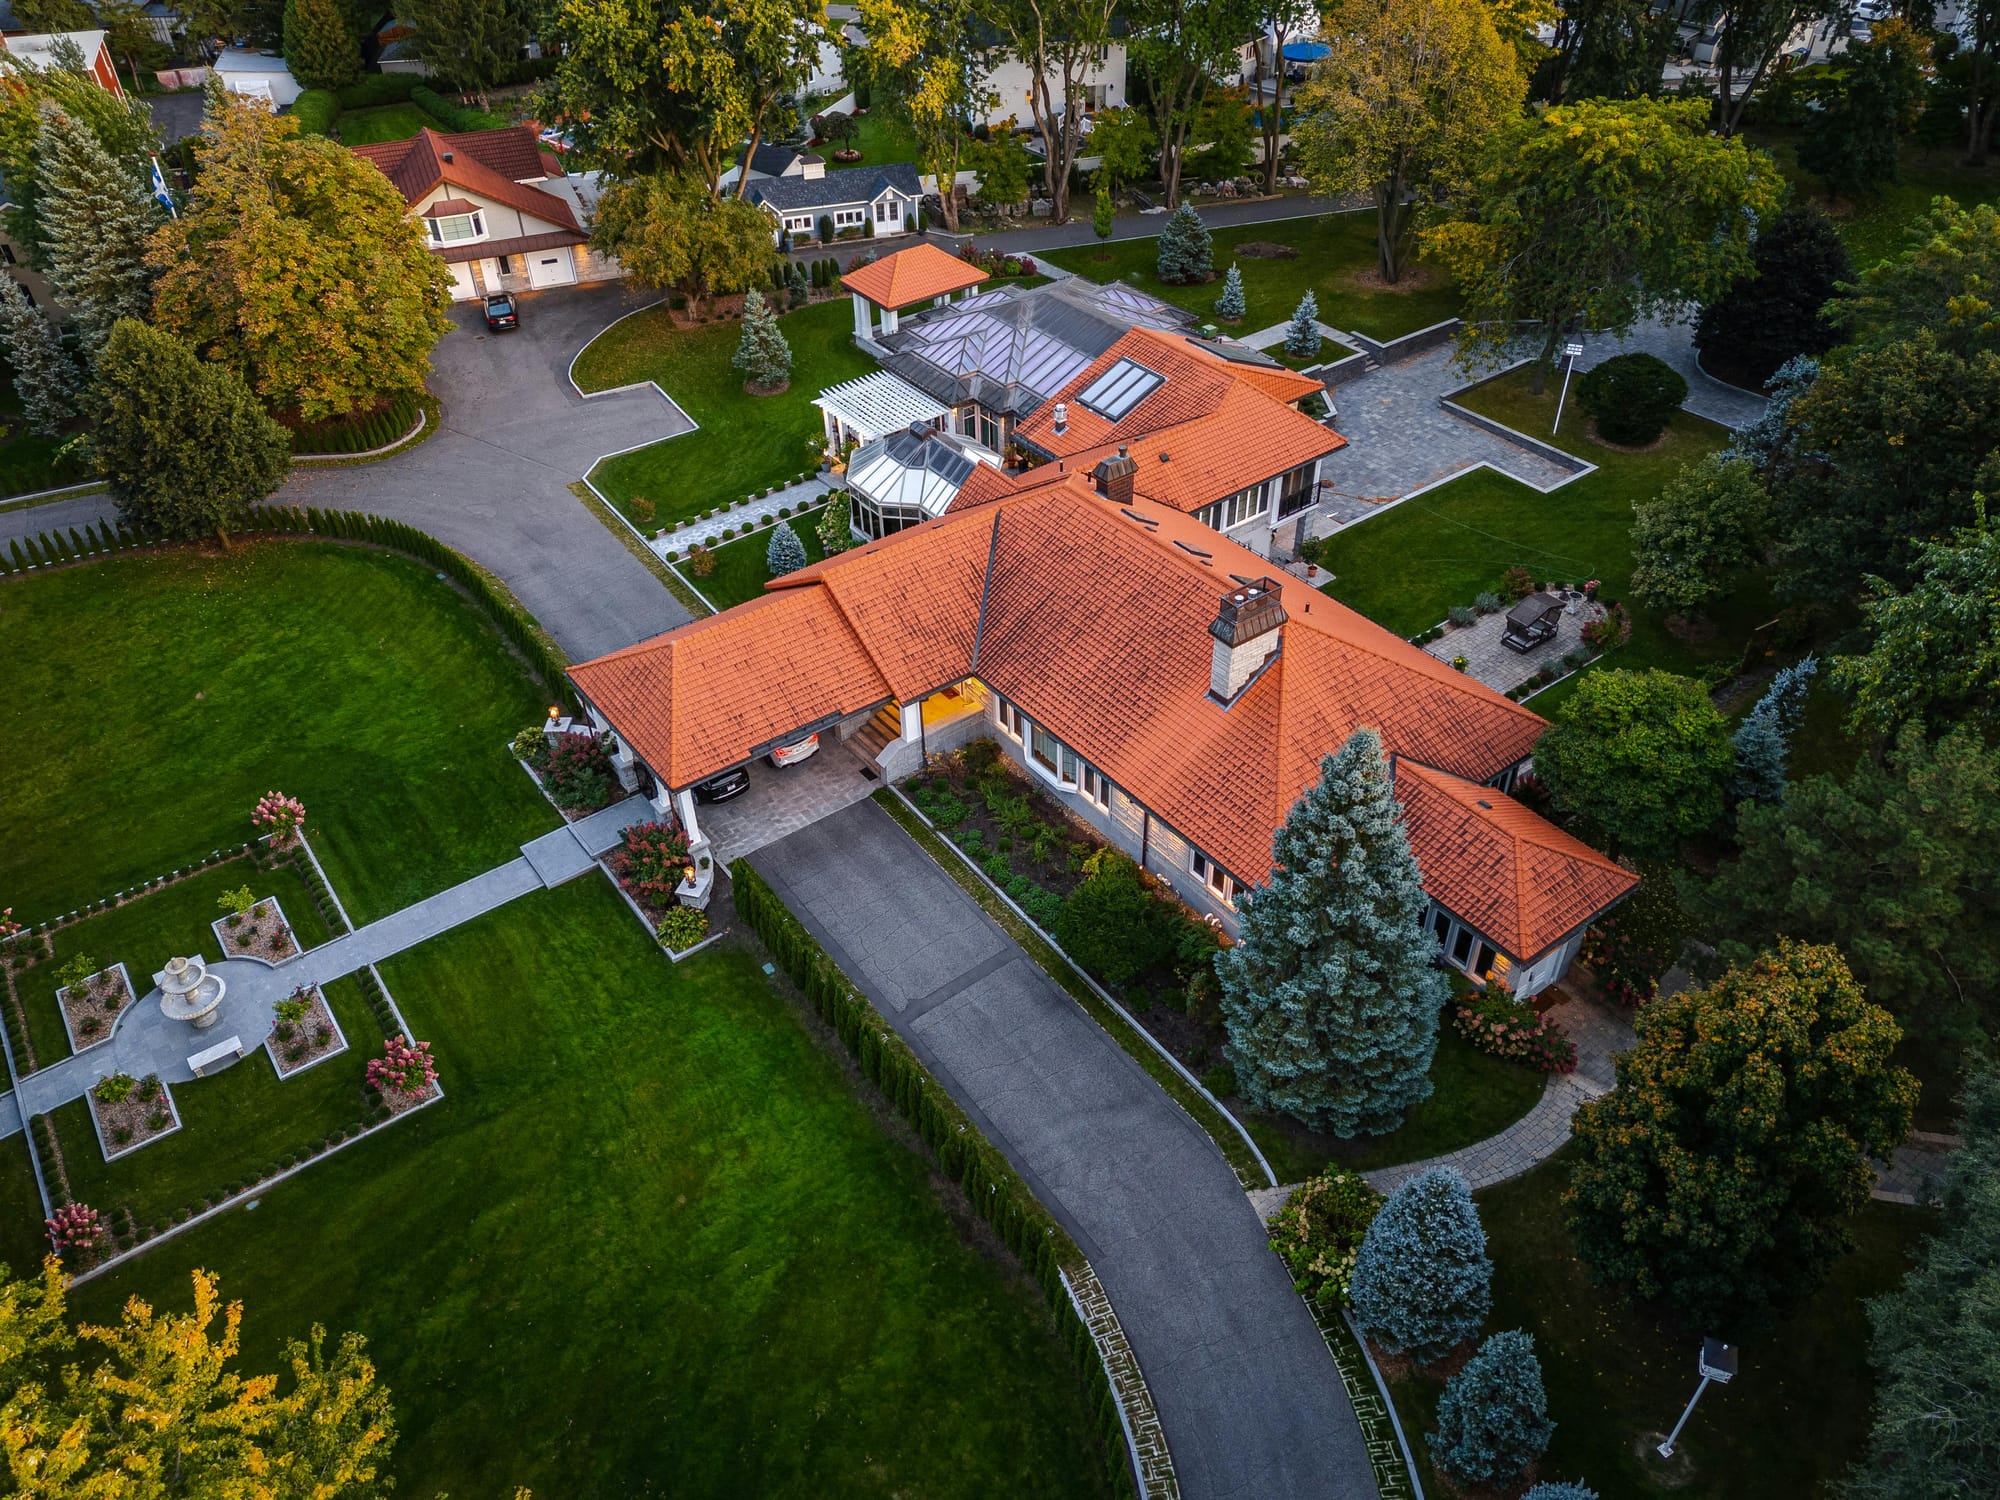
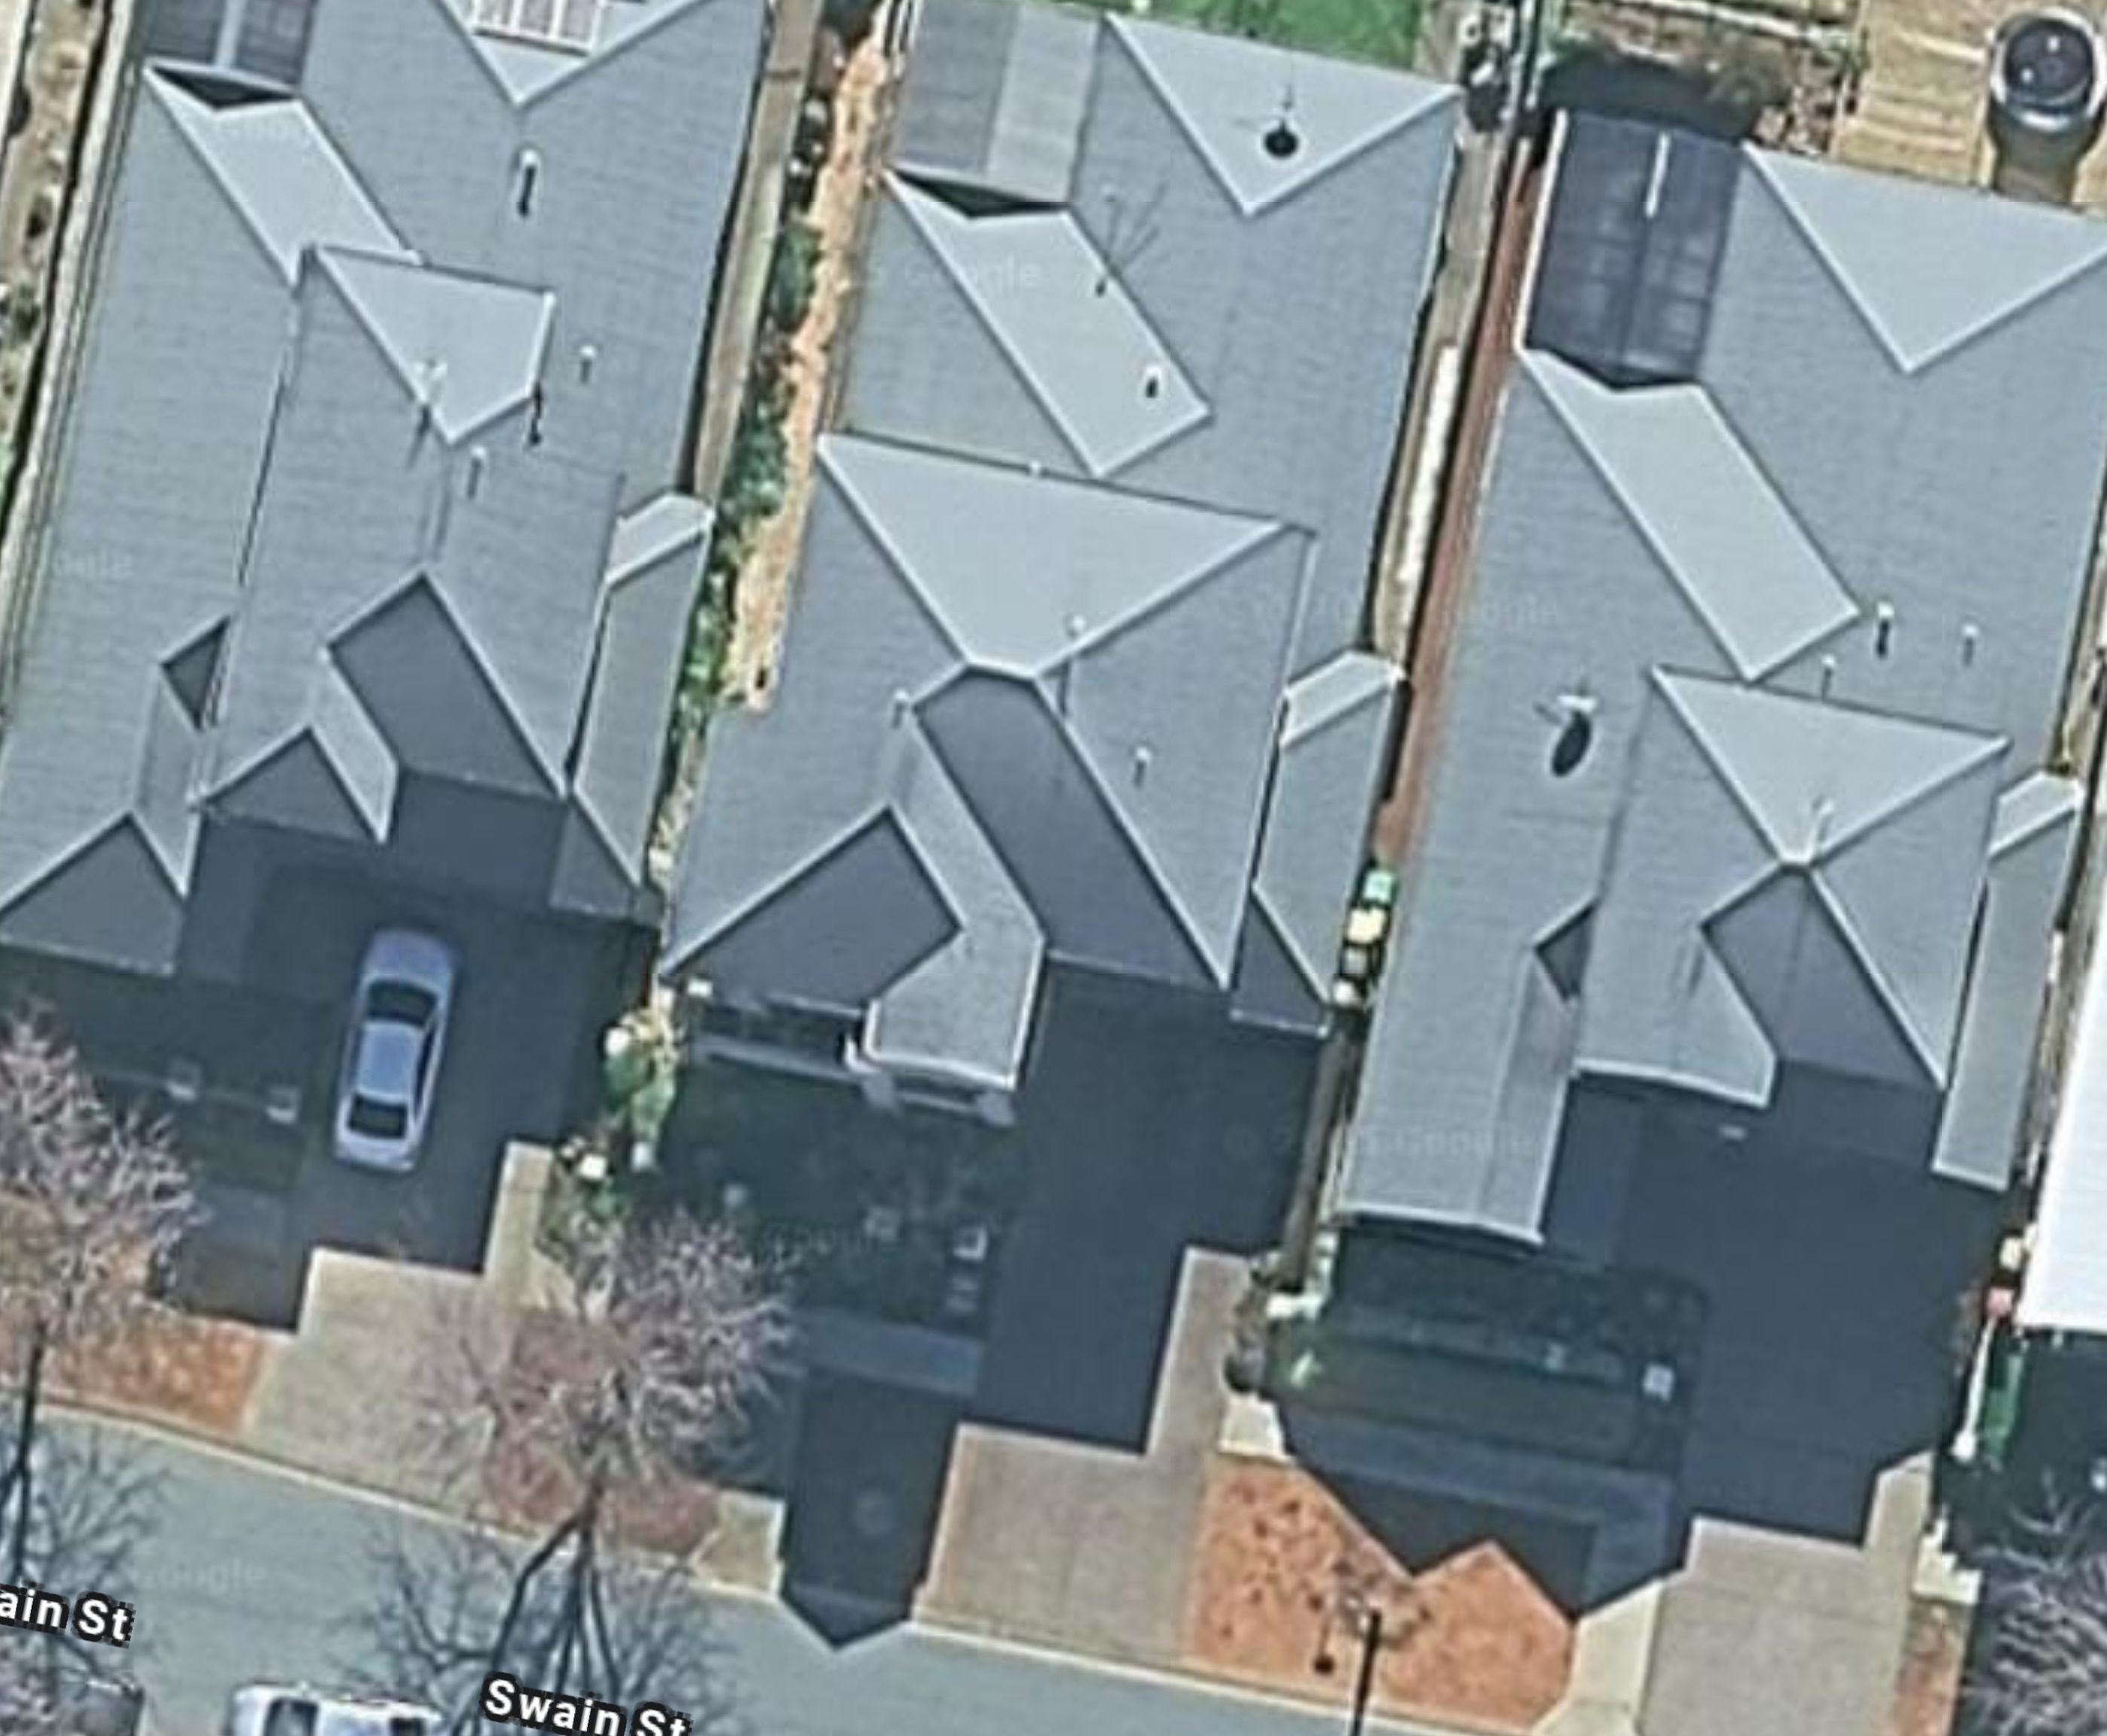

Dataset for training an object-detection model having a mix of high resolution and low resolution images, all containing driveways
Ideally, collect at least 70 images, from different angles and lighting, of a similar nature to the images you wish to test with.
Step 2: Annotation
Once the dataset for training is ready, we can create a new account on Roboflow and sign in.
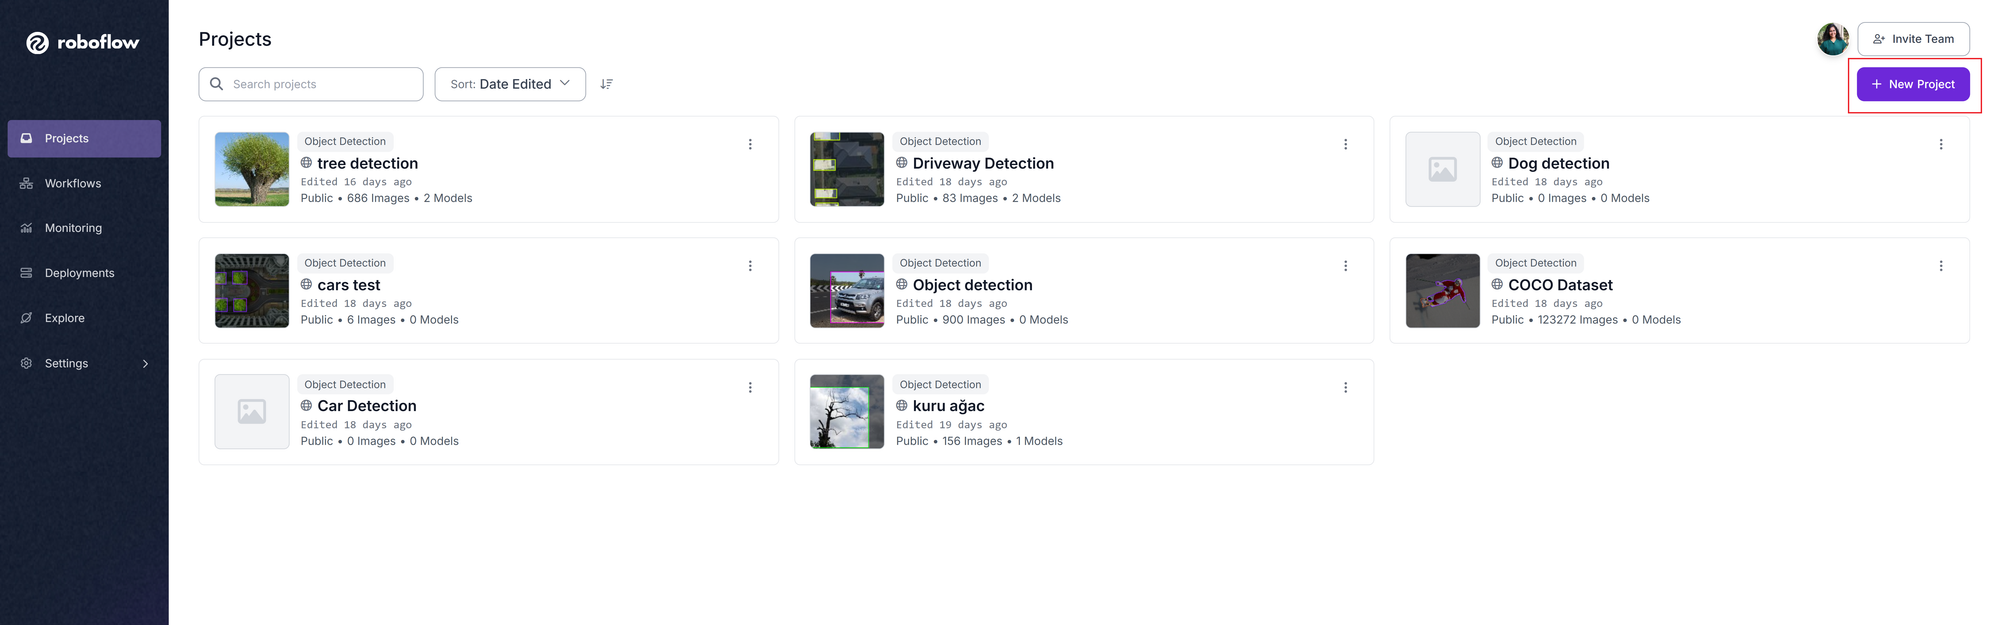
Once signed in, you will be directed to the Projects page. To start the training process, we click on New Project.
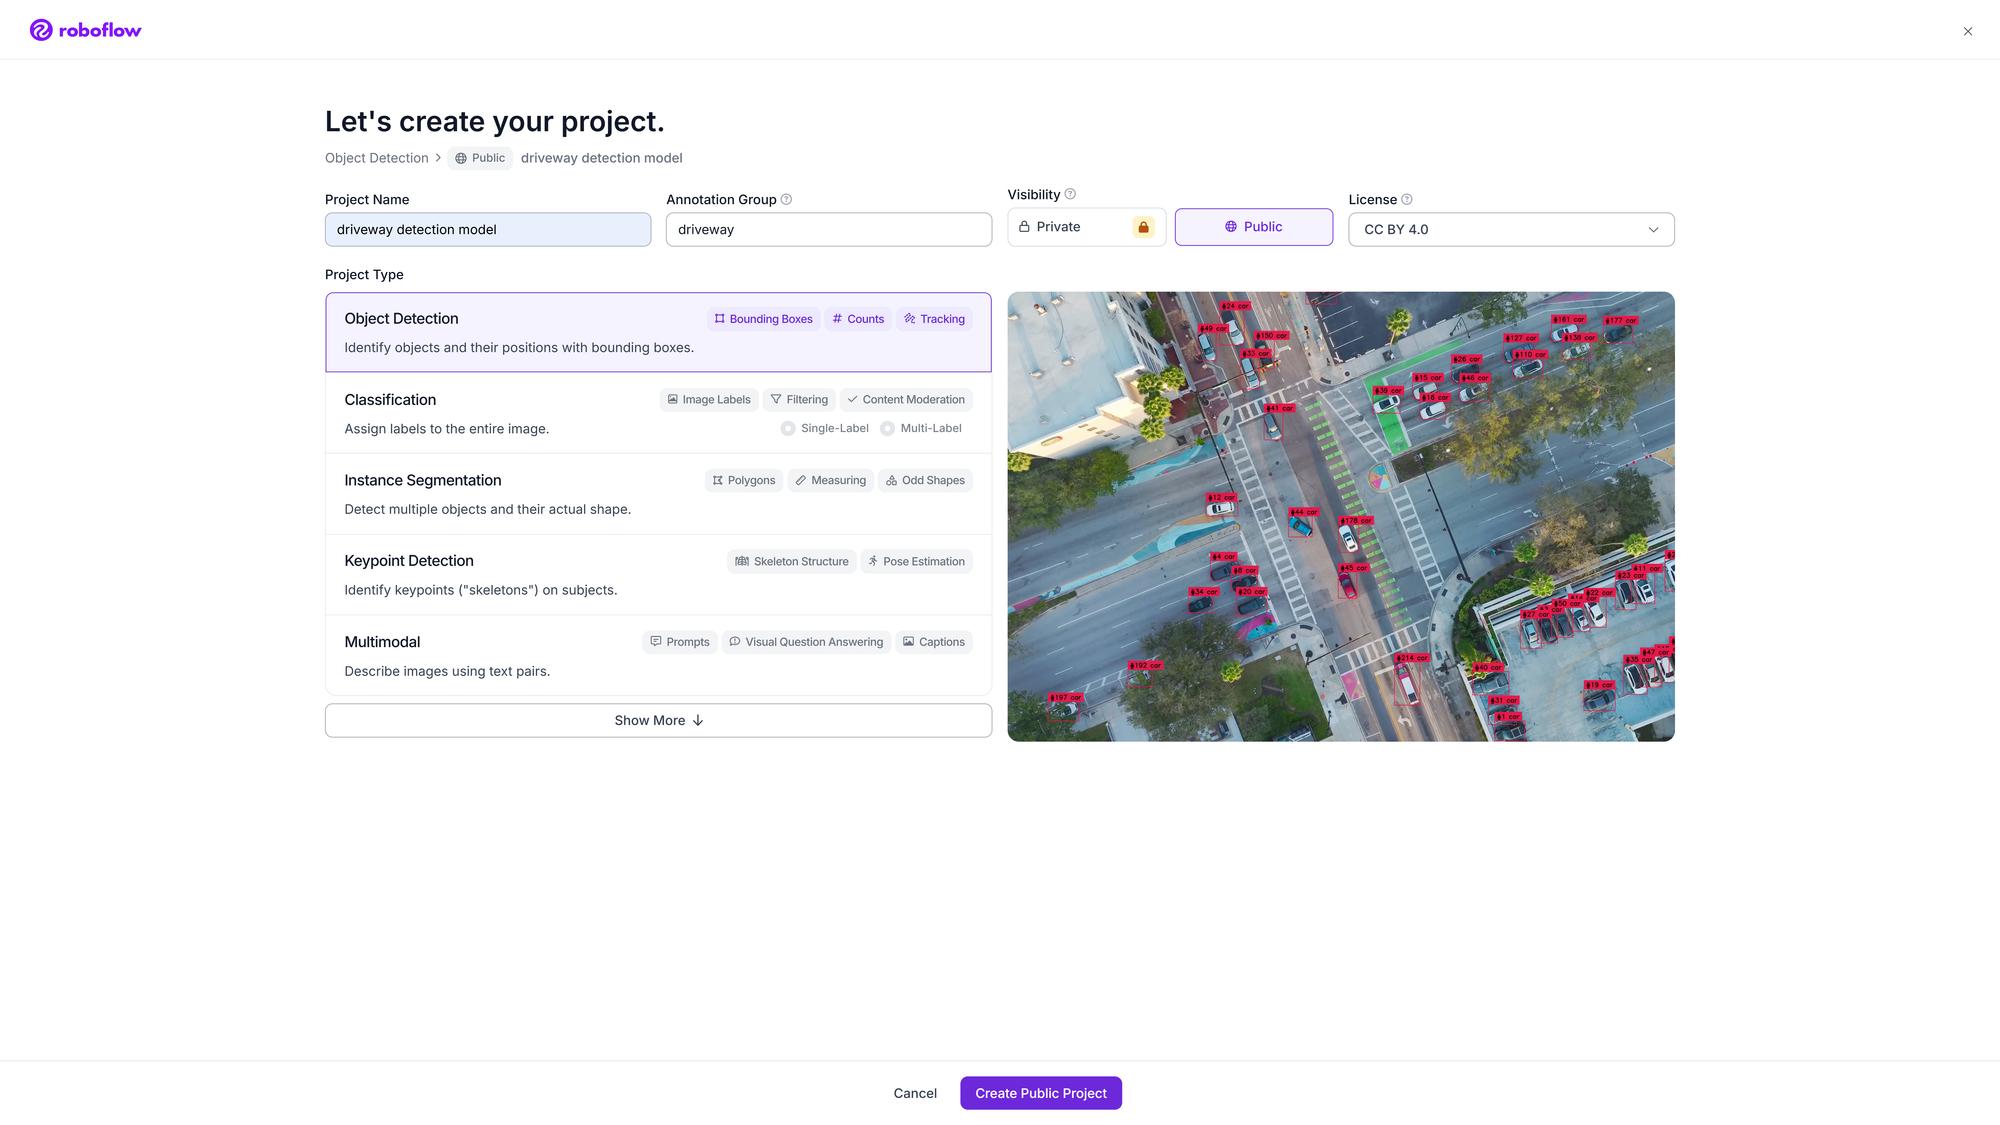
- Project Name: Anything goes. In our case, it will be "driveway detection model"
- Annotation Group: What you want the model to detect. In our case, "driveway"
- Project Type: Object Detection.
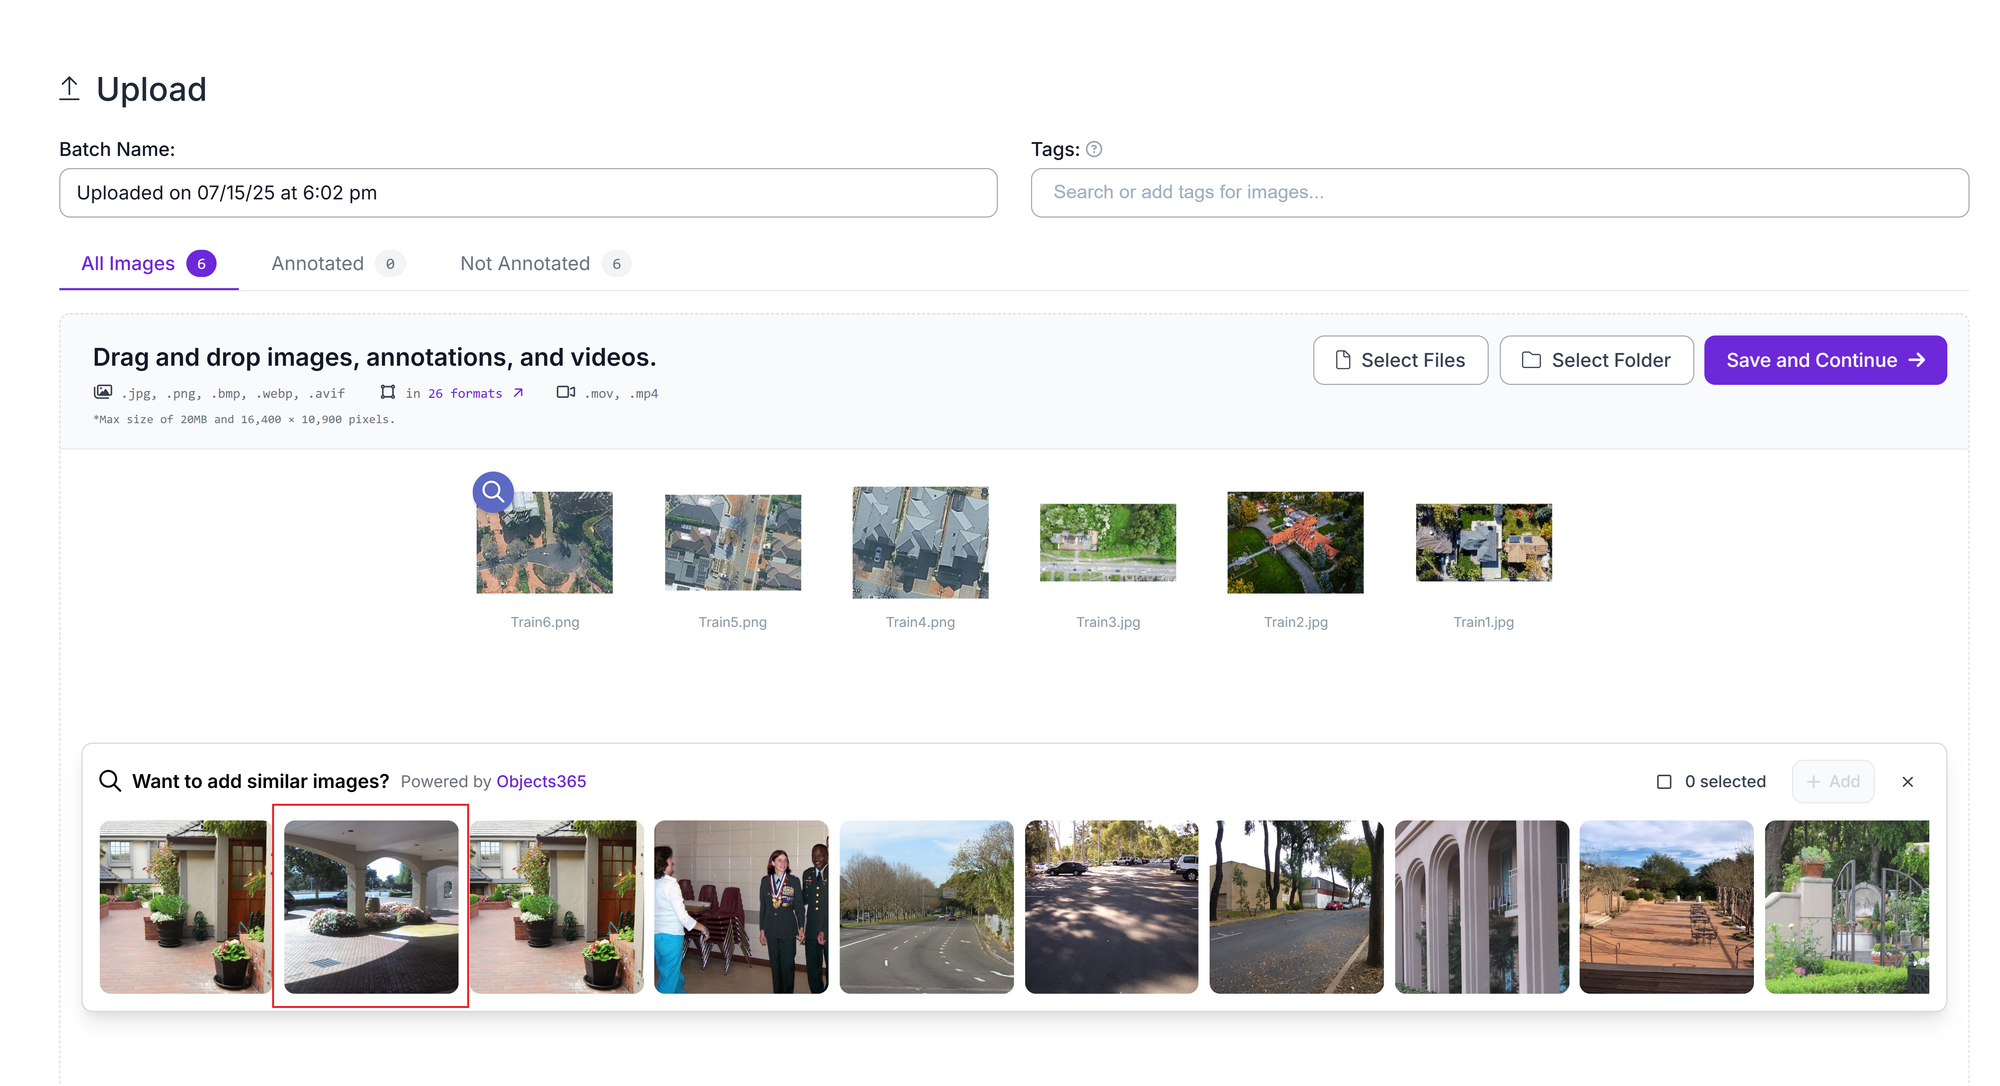
Once you have created a "Public" Project, drop all the images you have collected here. The files could have been images, videos or PDFs.

The following screenshot shows how Roboflow suggests images that look like some of the images in our collection. If there are any images in the suggestions that match your images, you can add them to the dataset and click 'Save and Continue'.
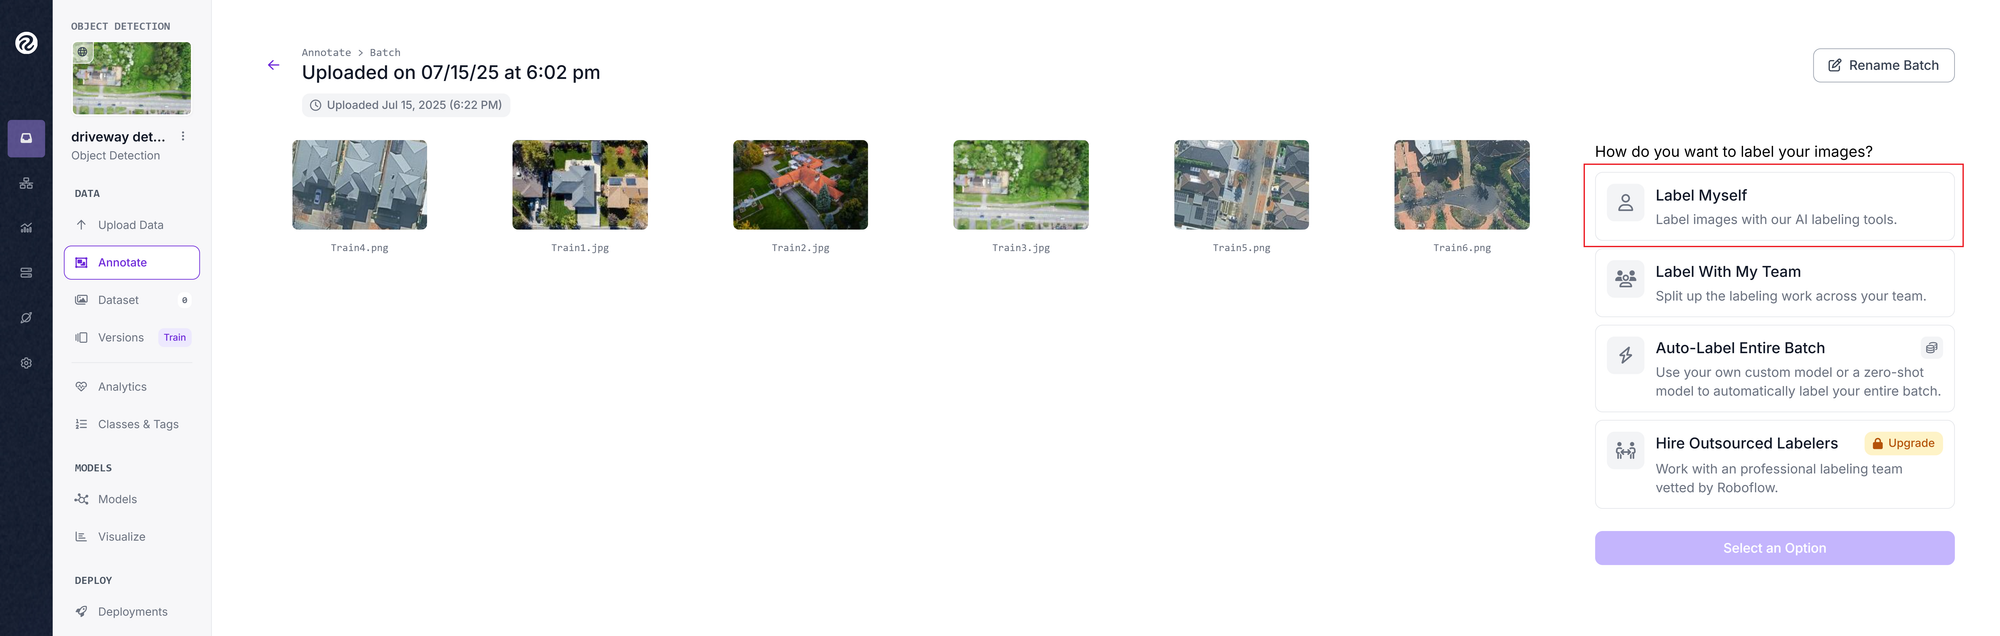
The next step is labelling the images. There are multiple options for labelling:
- Labelling yourself,
- With the help of your team, or
- Using auto-labelling.
For this tutorial, we will choose 'Label Myself' and start annotating!
For each image, draw boxes around the driveways and label them. Repeat this process for all the images. The following short video shows the process in action.
Annotation Process
The annotated images will teach Roboflow to learn and repeat this process on a larger cohort of images, potentially thousands.

Step 3: Model Fine-tuning
The annotated images can then be used to fine-tune a model of your choice available on Roboflow.
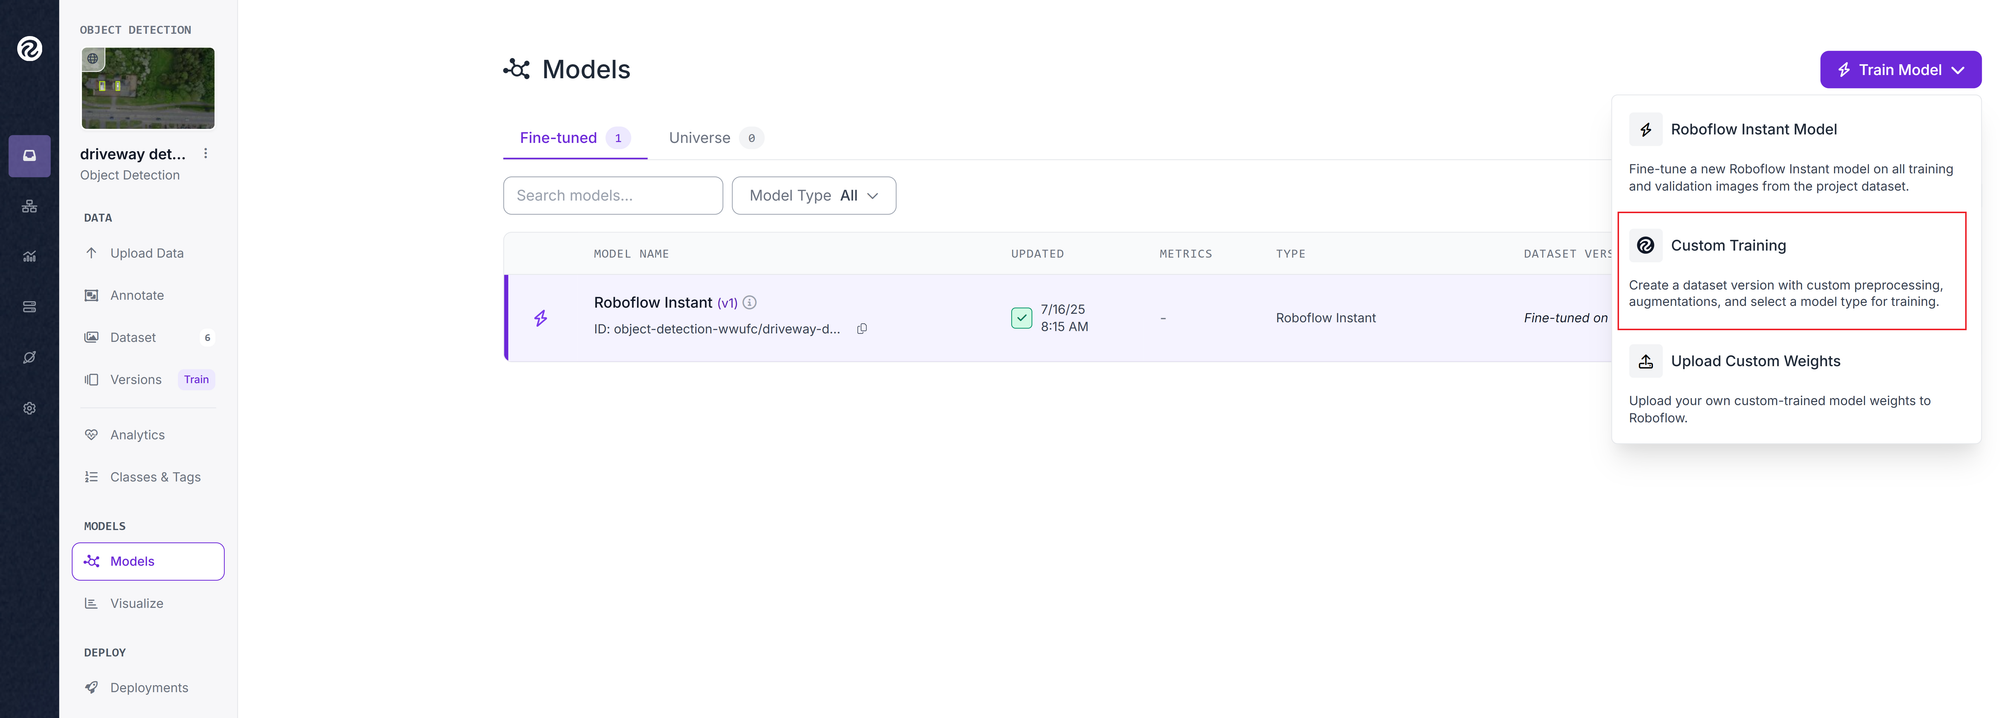
In Custom Training, there are the following sections:
- Source Images: The annotated images in your dataset
- Train/Test Split: Choose Rebalance. 70% for training, 15% for validation, and 15% for testing is the ideal split.
- Preprocessing: Decrease training time and increase performance by applying image transformations to all images in this dataset. This step is optional, but can improve performance. It involves applying resize or crop, or changing the orientation of all your images. The changes will be applied automatically
- Augmentation: Adjustments like changing the hue or saturation, or brightness can be made to all your images. These edited images will then be added back to your dataset. Your final dataset will thus have more samples to train from. Augmentation is not mandatory.
Once you are happy with all the customisations, click Create.
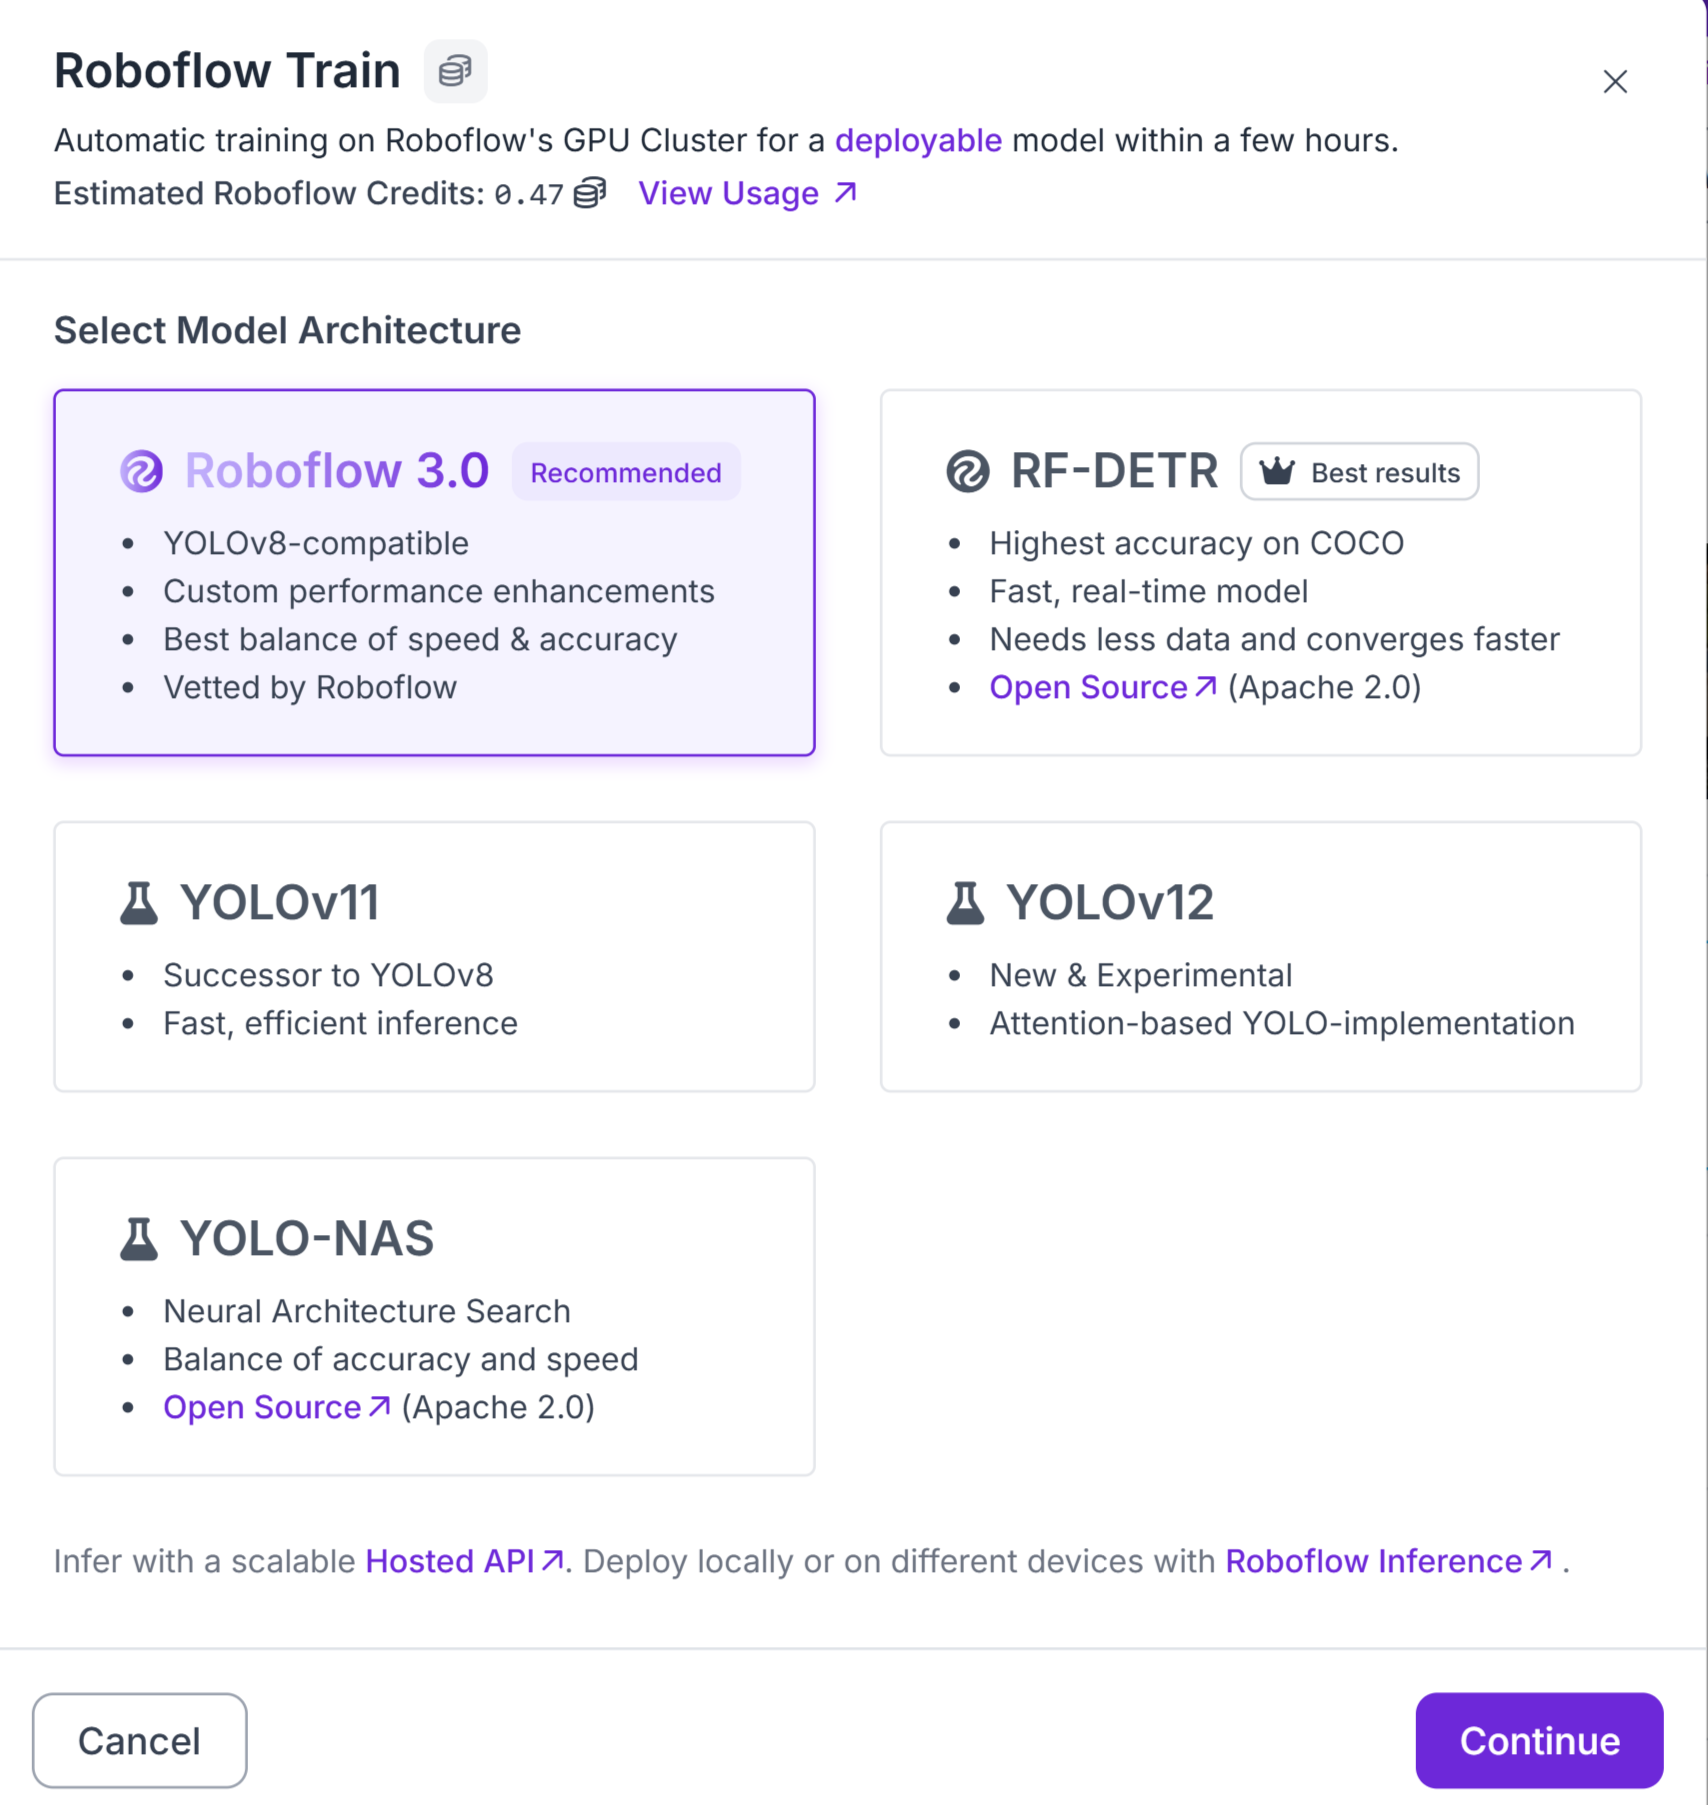
Different models, each with their pros and cons, are listed on Roboflow. Based on your needs, you can choose the one that works best for you. We used RF-DETR in this tutorial. Then, Start Training. Depending on the size of your dataset, fine-tuning time varies. For a dataset of approximately 70 images, it will take more than 2 hours. You will get an email notification when the fine-tuning completes.
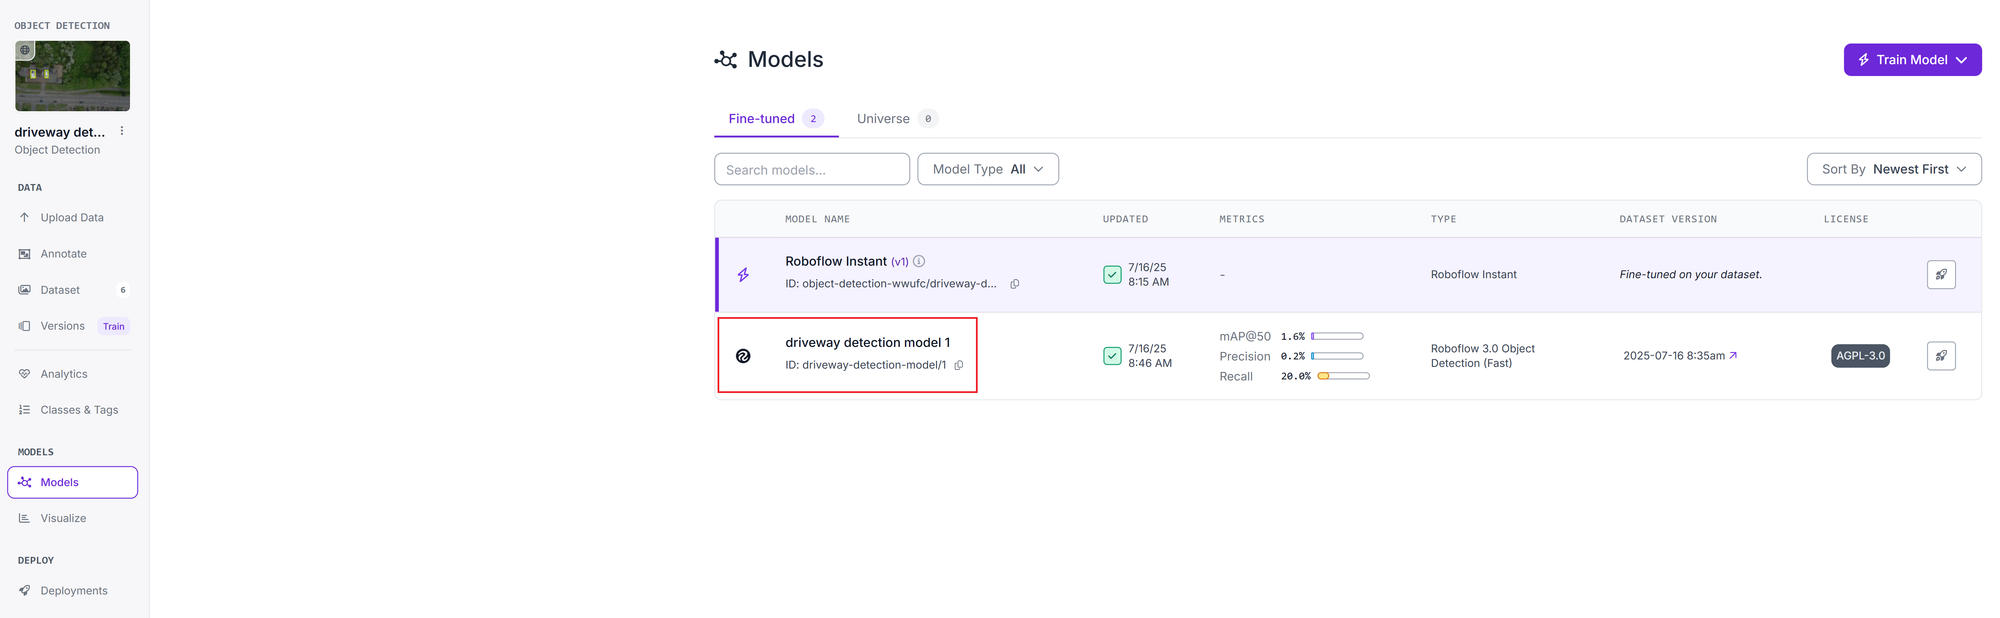
Once completed, you can find your model in the Models section and in order to use it, click Deploy Model.
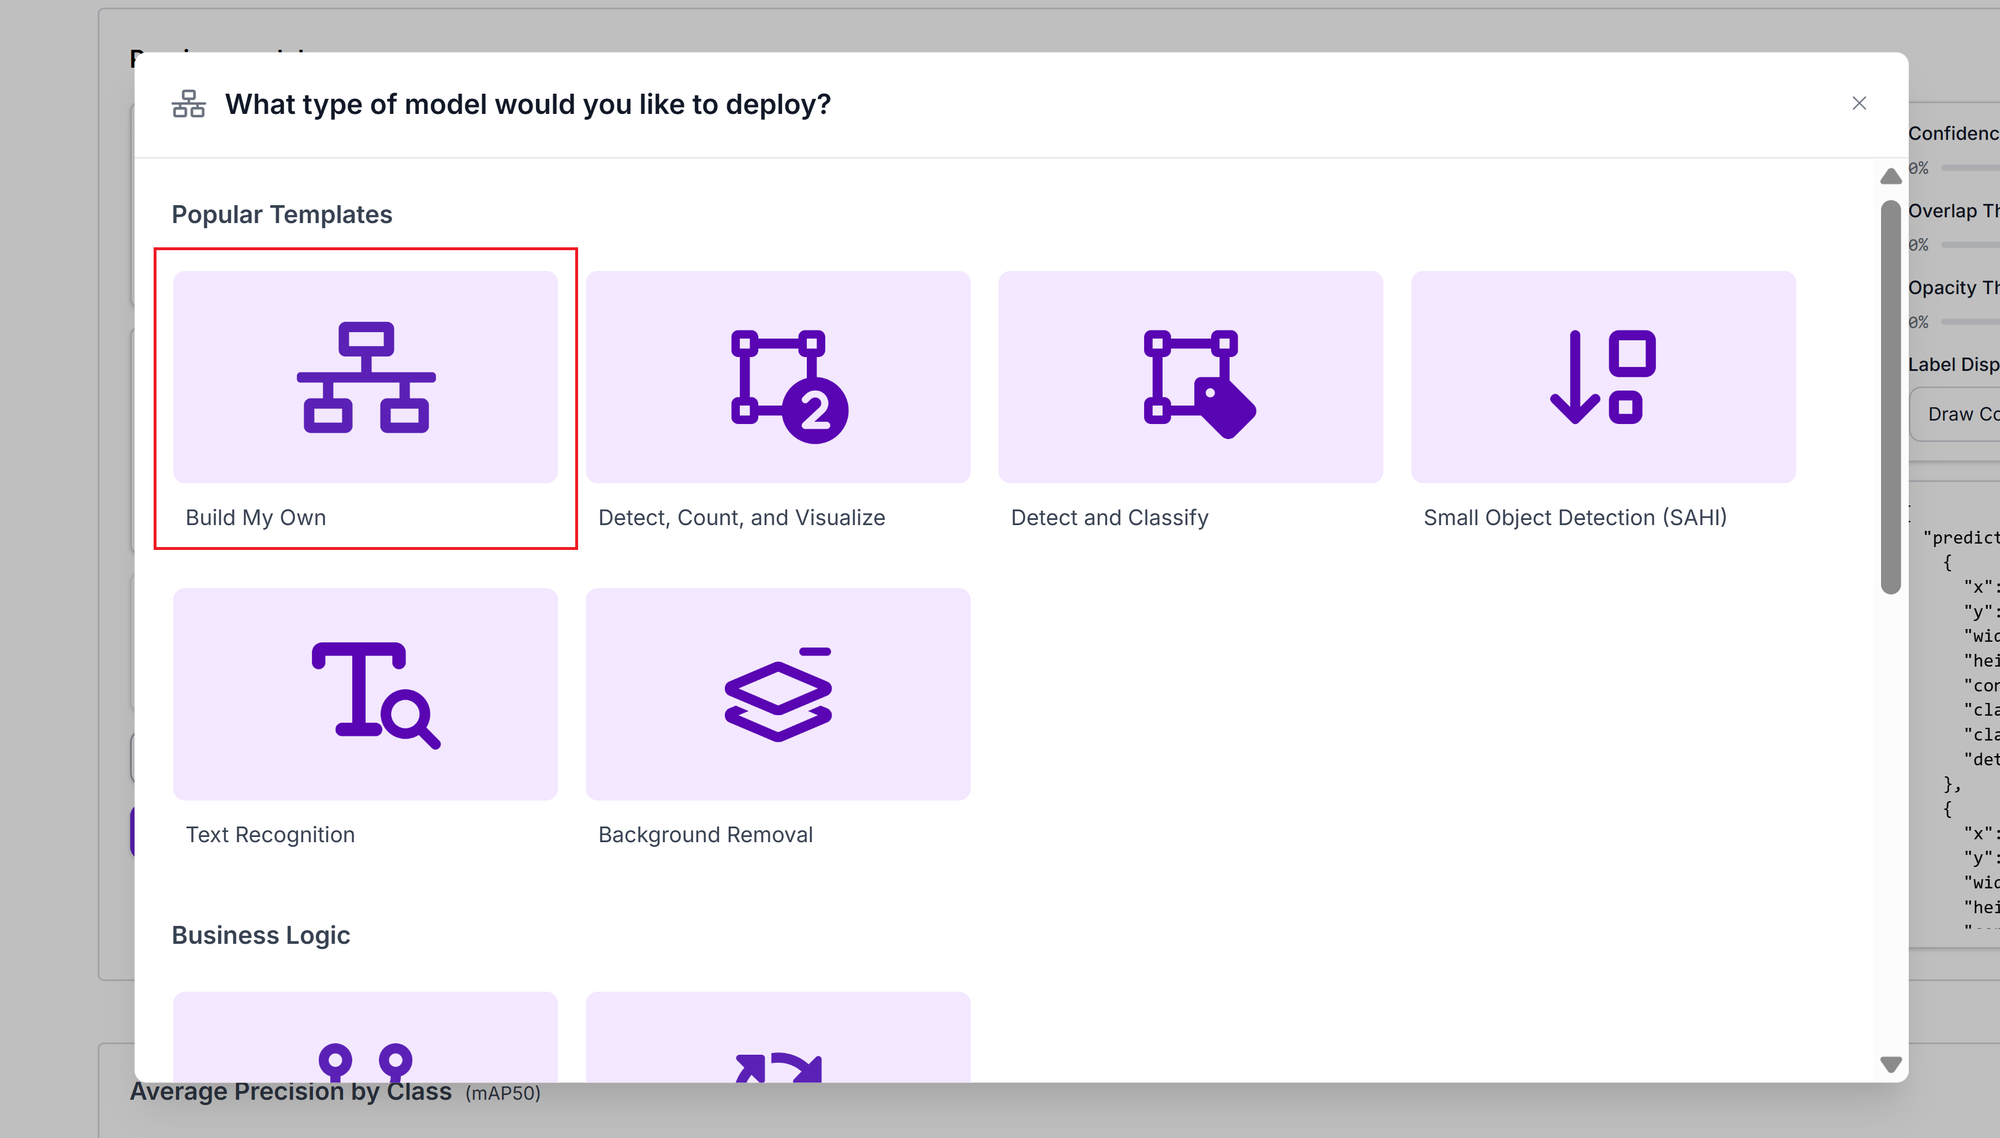
To use the model and test it out with your images, you can deploy it using a workflow. Choose 'Build My Own'.
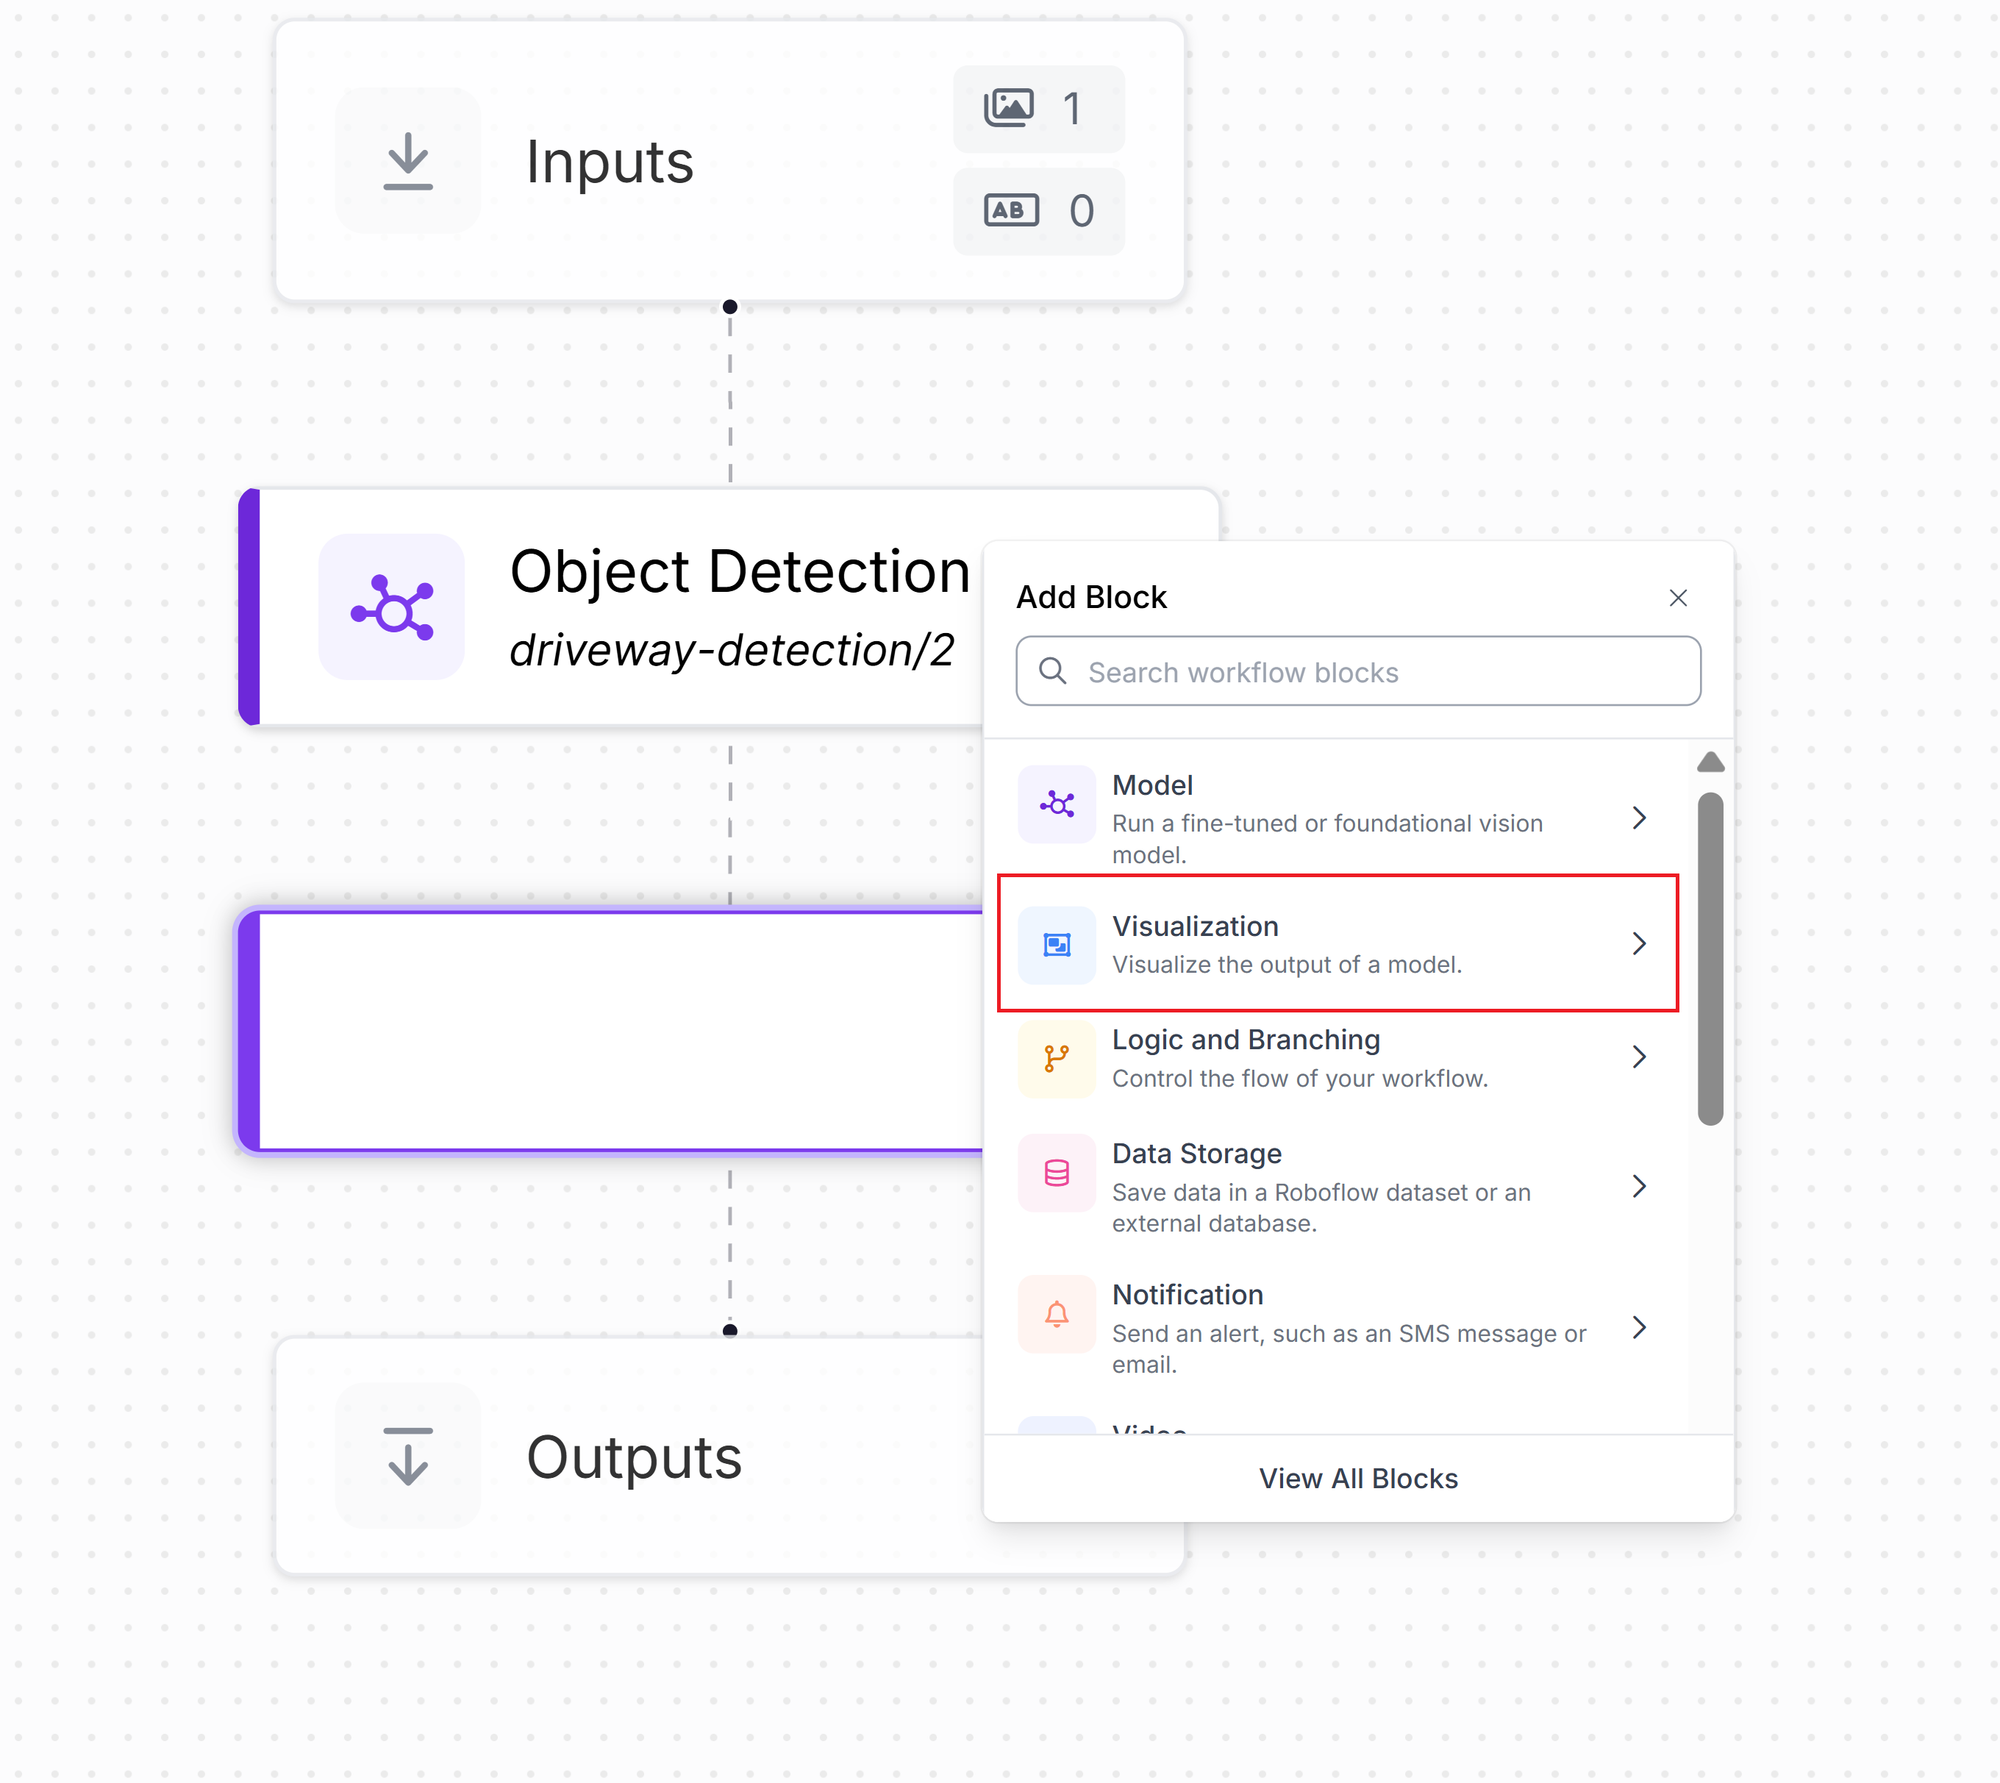
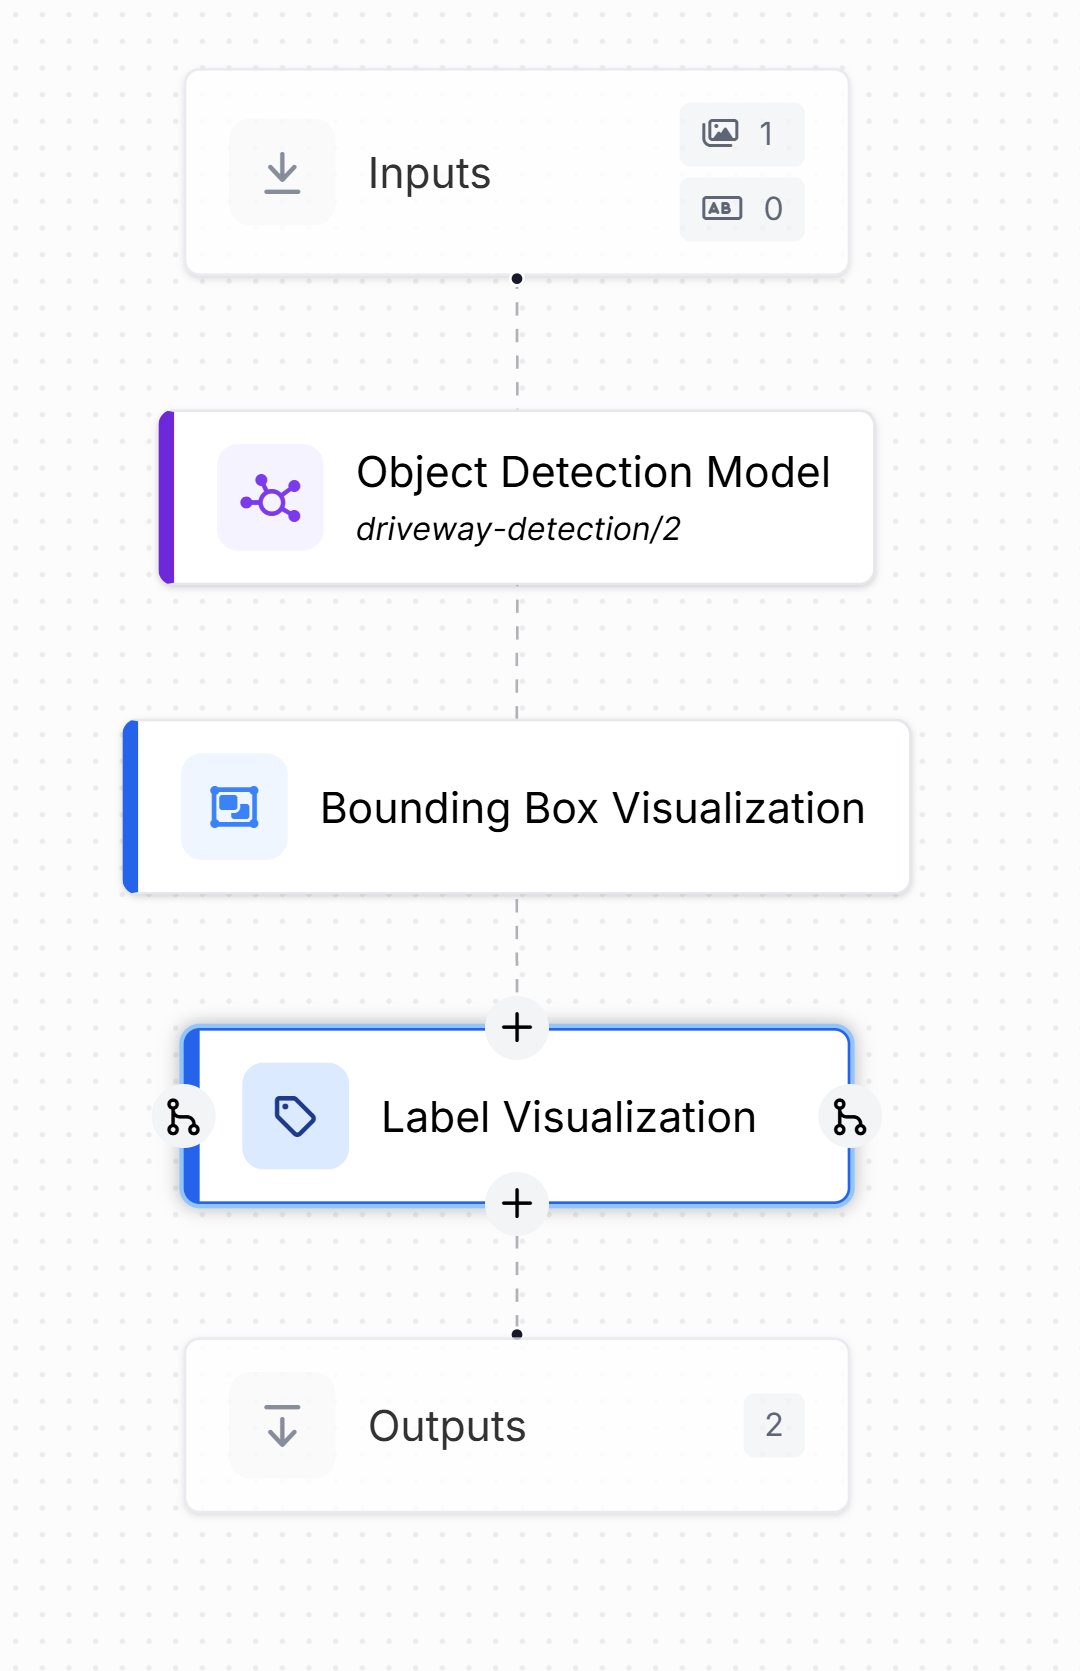
The basic version of the workflow will contain three nodes: Inputs, Object Detection and Outputs. For our output to have a clearly marked boundary and label, we need to add 2 more Visualisation nodes: Bounding box visualisation and Label Visualisation. To add the new nodes, click on the + sign after the Object Detection block.
The 2 new nodes can be customised with box colour, boundary radius etc. For this tutorial, we have kept the colour palette 'Custom' and Custom Colours 'FF0000'. This gives the boundary and label box a red hue.
Click on the Inputs box. Add the image you wish to test with and click Test Workflow.
Workflow in action
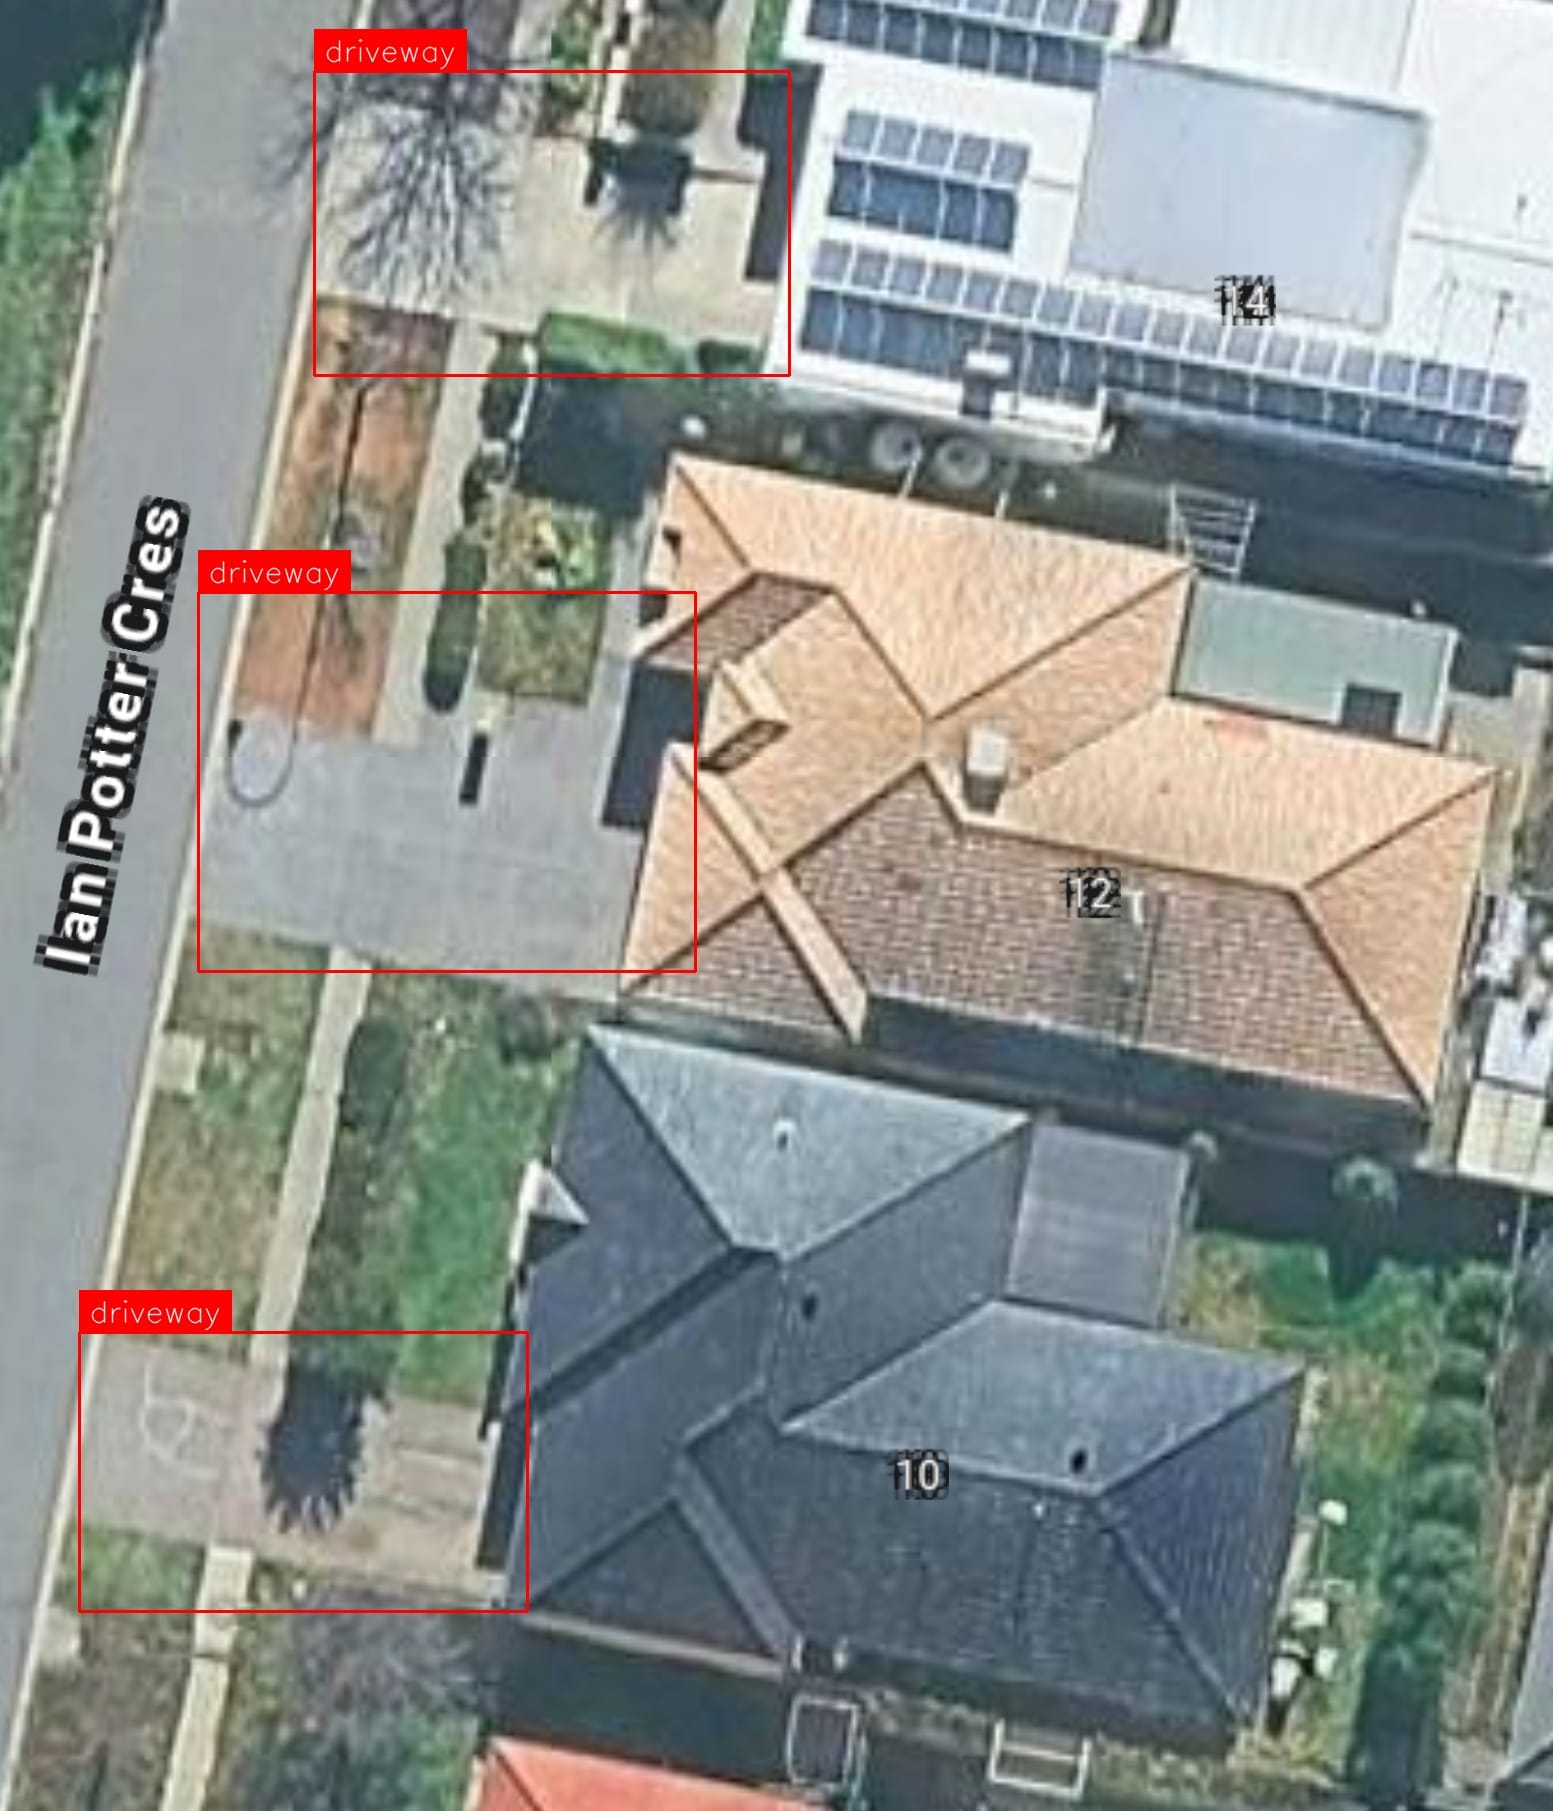
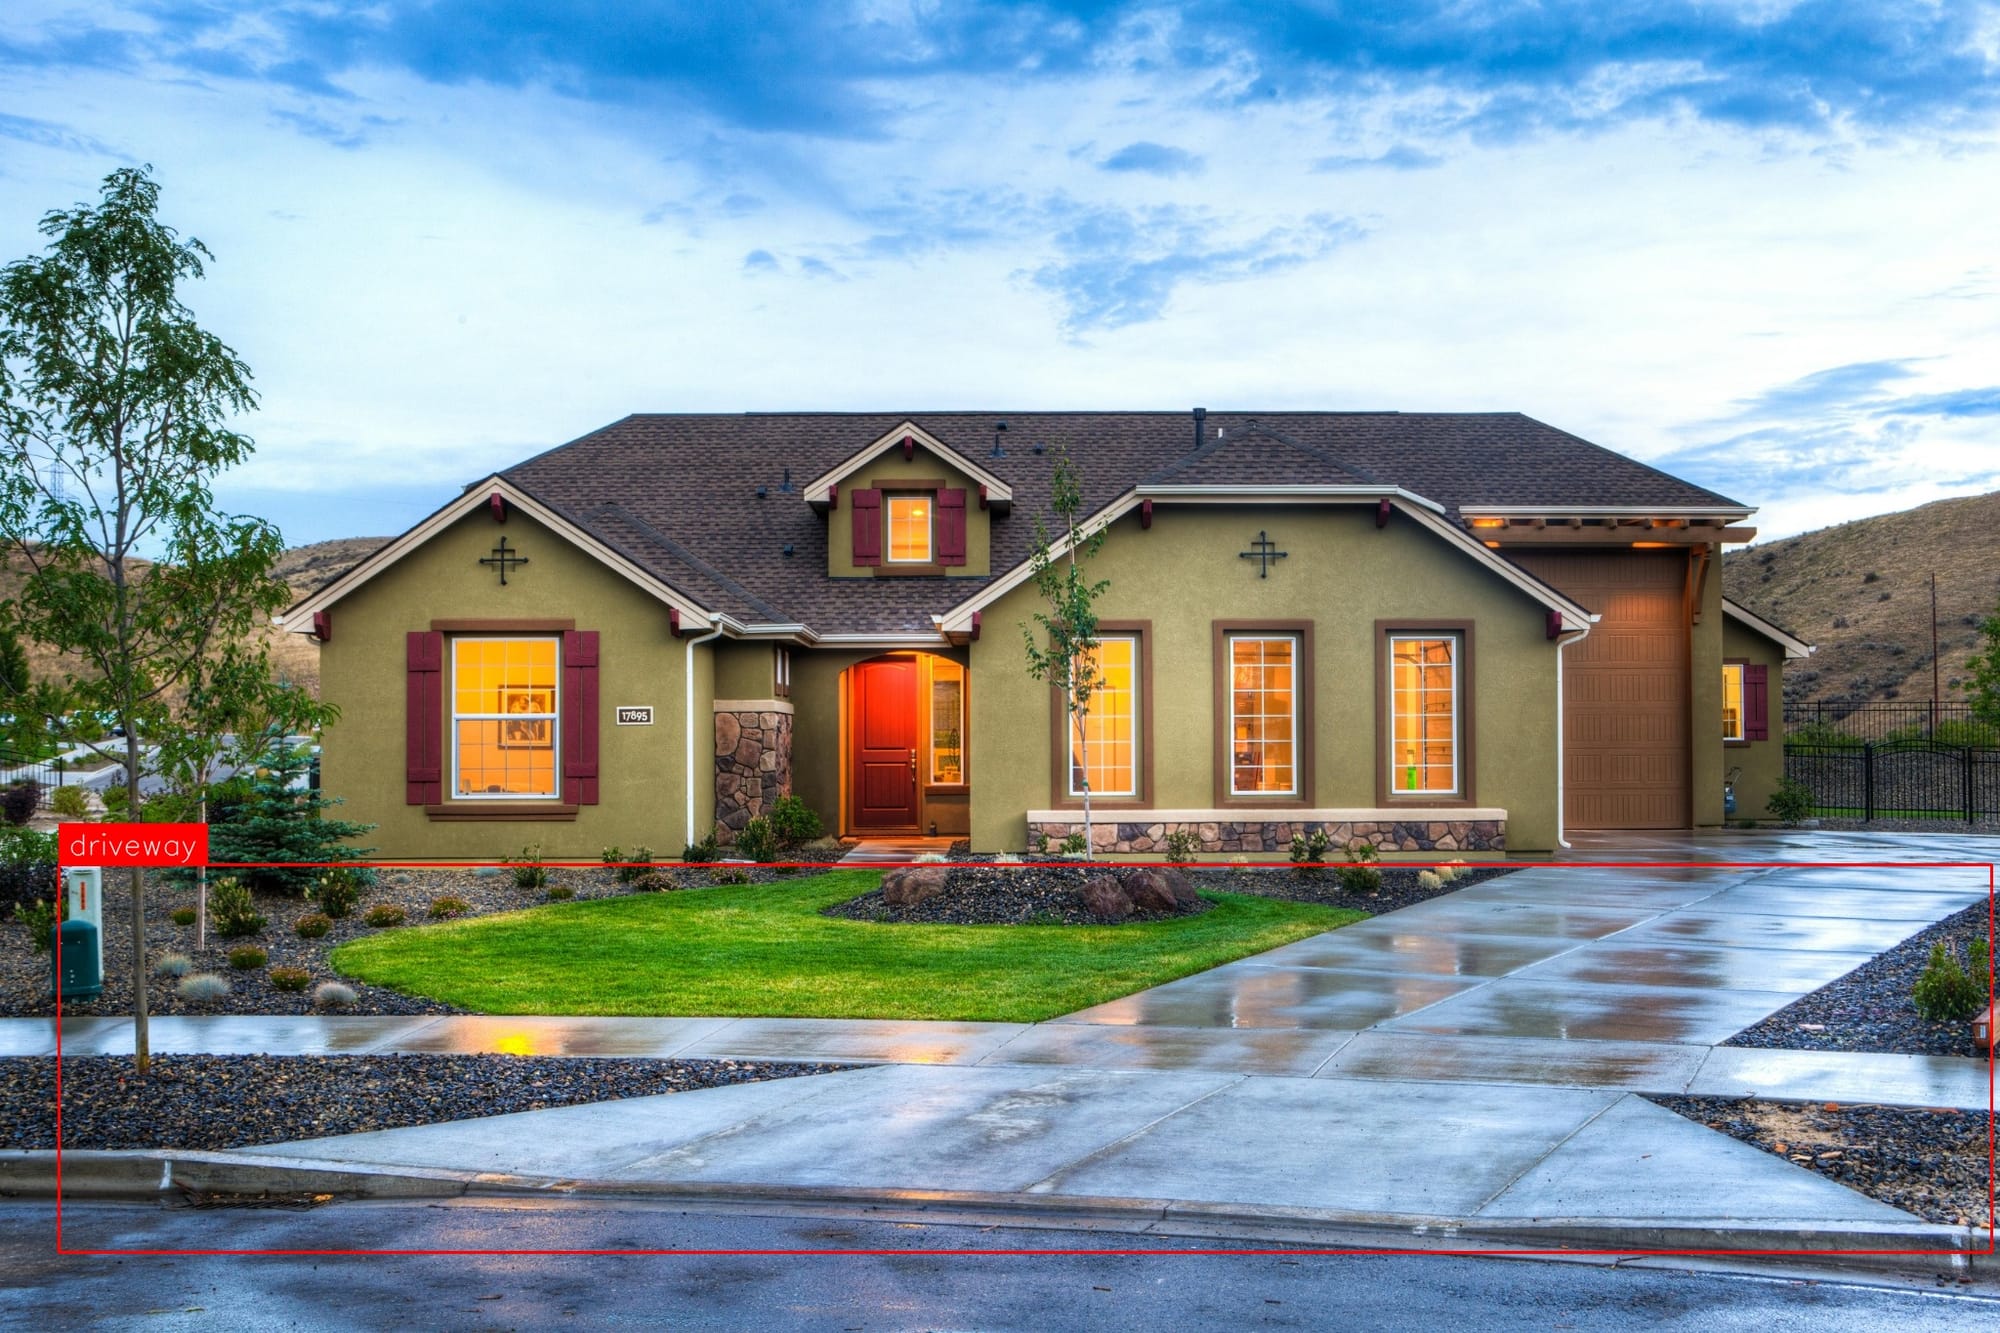
Input and Output for low resolution and high resolution images for Object Detection using Roboflow
Conclusion
By using Roboflow’s platform and object detection models, planners, asset managers, and operators across industries can transform how they inventory, monitor, and manage assets. With automated pipelines in place, organisations can ensure compliance by detecting unapproved or modified infrastructure, optimise maintenance budgets through up-to-date inventories, and enhance spatial analysis by feeding location data into GIS or business intelligence systems. These capabilities extend far beyond infrastructure management. In manufacturing, object detection can identify defects, count components, and monitor machinery for operational anomalies. In retail, it can track inventory levels, analyse customer behaviour, and optimise product placement. In healthcare, it can assist in medical image analysis by detecting anomalies or specific anatomical structures.
The system can also integrate with real-time monitoring applications, enabling proactive decision-making. By embedding AI-powered vision into everyday operations, organisations in any sector can maximise resources, conduct faster inspections, and make data-driven decisions that improve efficiency, safety, and service delivery.
Catch the latest version of this article over on Medium.com. Hit the button below to join our readers there.


