


How to install Google Antigravity and Use Planning Mode
-

- •

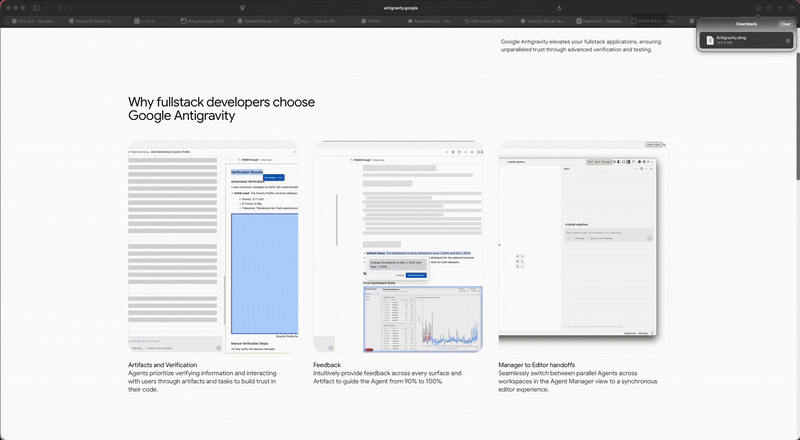
Google Antigravity is Google’s new agentic development platform, designed to shift the focus from writing lines of code to orchestrating complex tasks. Built as a fork of Visual Studio Code (VS Code), it re-imagines the developer experience around managing autonomous agents.
This guide will walk you through the entire lifecycle: Installation, Configuration, Planning, and Automated Testing, using a real-world example: implementing a Researcher Profile page.
Step 1: Installation and Setup
Antigravity is available as a public preview and is compatible with macOS, Windows, and specific Linux distributions.
1. Download and Install
- Download: Go to the official download page
antigravity.google/downloadand select the installer for your operating system.
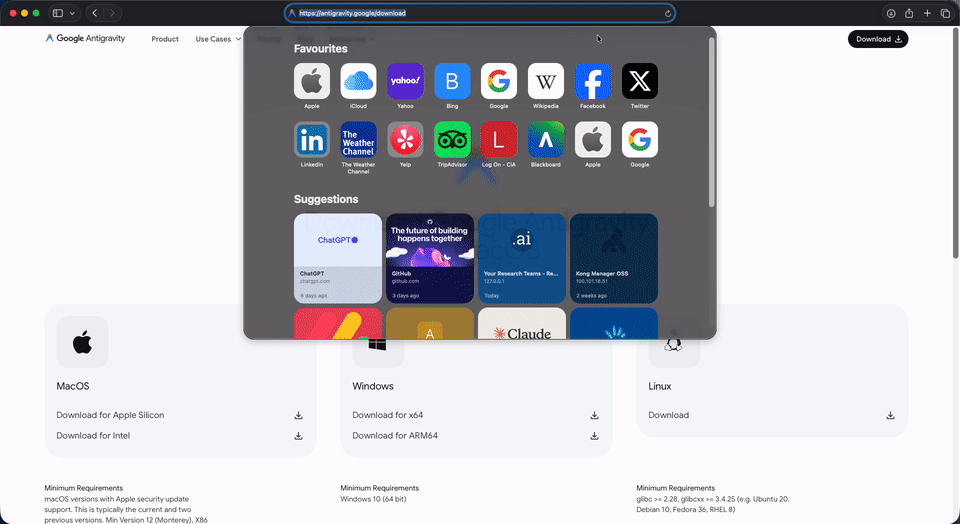
- Installation: Run the installer and complete the setup process.
2. Initial Configuration
- Launch Antigravity: Upon the first launch, you will be prompted to sign in with your personal Gmail account. This grants you access to the platform and the Gemini 3 Pro model, which powers the agents.
- Define Execution Permissions: One of the first screens asks for your agent's terminal execution permissions. This is critical for safety:
- Off: Requires approval for most terminal commands.
- Auto: The Agent decides whether to ask for permission based on the command's risk.
- Turbo: Always auto-executes commands (except those on a Deny list). Note: Be cautious with Turbo mode, as agents have been known to execute unexpected commands.
- Open Your Project Workspace: In the Agent Manager (Mission Control) dashboard, open your existing project folder.
Step 2: Preparation (Teaching the Agent)
Before we start building, we need to teach the agent our testing standards. In Antigravity, you do this by creating a Workflow. Think of this as a "Standard Operating Procedure" that the agent will follow every time you ask it to write tests.
How to Create the "Unit Test" Workflow
- Open the Chat Panel on the right side of the editor.
- Click the
...(More) menu at the top-right of the chat and select Customizations. - Navigate to the Workflows tab and click
+ Workspace. - Paste the configuration below into the new file and save (
Cmd+S/Ctrl+S).
The Workflow Configuration:
name: generate-unit-tests
description: Generates strict Django unit tests with 404 and Auth coverage.

# Goal
Create comprehensive unit tests for the selected Django file, ensuring all views/models have coverage.

# Steps
1. **Analyze**: Identify all public views and models in the target file.
2. **Plan**: Outline test cases for "Happy Path", "Edge Cases" (404s), and "Security" (Auth checks).
3. **Execute**:
   - Write tests using `django.test.TestCase`.
   - Rule: Always name the file `test_<filename>.py`.
   - Rule: Use `model_bakery` for data fixtures.
4. **Verify**: Run `python manage.py test <new_test_file>` and fix failures immediately.
Now, your agent "knows" how to test your code properly. We are ready to build.
Step 3: The Mission (Planning the Feature)
We will now use the agent to build a Researcher Profile Page for our Django/React application.
1. Define the High-Level Objective
In the Agent Manager (Mission Control), create a new task and provide the high-level objective.
Prompt Example:
"We are building a new Researcher Profile page. The page needs to act as a profile for a researcher (identified by ORCID), displaying their bio, publications, grants, and datasets. It must also feature an interactive Collaboration Graph. The logged-in user who matches the profile must be able to edit their own information. Please generate a detailed implementation plan."
2. Review the Planning Artifact
Since Antigravity is set to Planning mode for complex tasks, the agent will first research the codebase and produce a Planning Artifact. It demonstrates architectural thinking:
- Backend Planning: The agent identifies the need for a new Django view (e.g.,
get_researcher) to aggregate data from multiple models likeResearcher,Publication,RelationResearcherPublicationandRelationResearcherGrant. - Frontend Modularization: It correctly scopes the work into distinct React components:
ResearcherProfile.tsx,WorkTabs.tsx,PublicationsTable.tsx, andCollaborationGraph.tsx.
Review the plan, and if it looks solid, click Proceed to let the agent write the feature code.
Step 4: The "Trust" Layer – Automating Unit Tests
Now that the agent has written the code, we need to ensure it works. Instead of writing tests manually, we will trigger the Workflow we created in Step 2.
1. Trigger the Workflow
In the chat window, command the agent to apply your "testing recipe" to the new file:
@agent /generate-unit-tests for graph/views.py
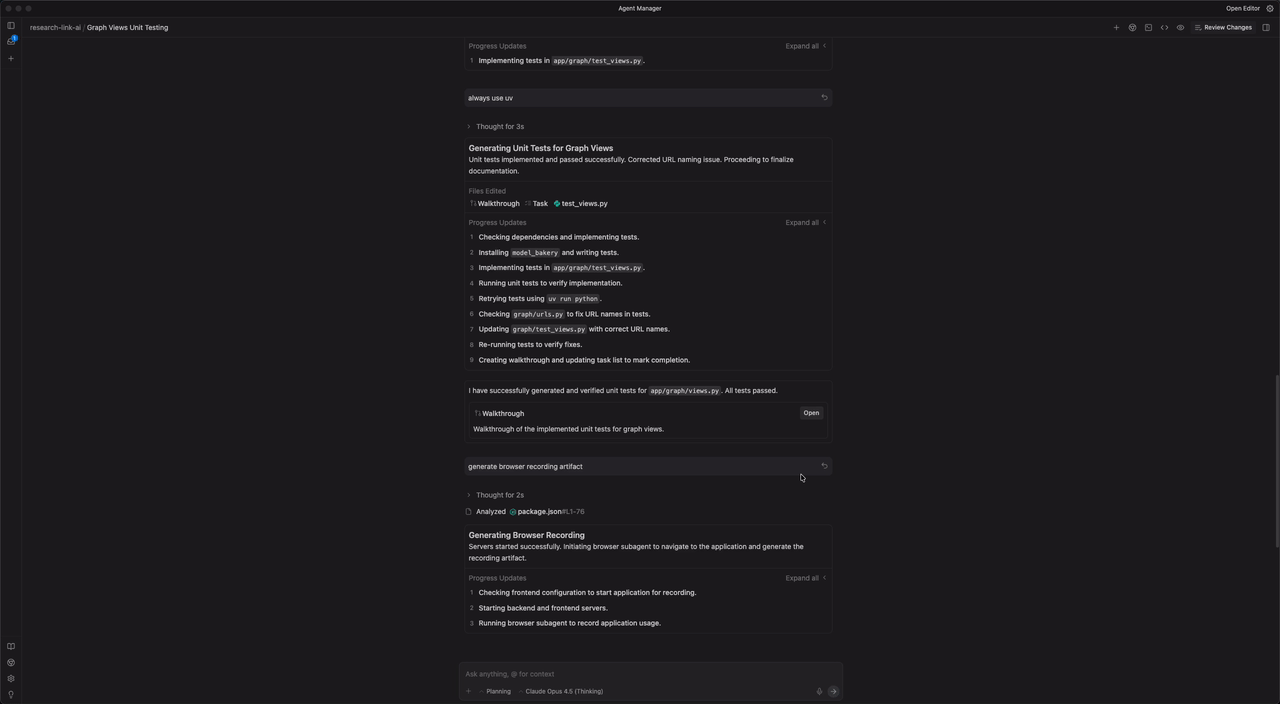
2. The Agent Execution Loop
Once triggered, the agent stops "guessing" and follows your strict instructions:
- Phase 1: Analysis: It reads
graph/views.pyand identifies the newget_researcherview. It notes that this view requires a logged-in user and an ORCID parameter. - Phase 2: Coding: It creates a new file
graph/tests/test_views.py. It importsmodel_bakery(as per your rule) to create a dummy Researcher and Publication for the test. - Phase 3: The "Verify" Check: This is the most critical part. The agent autonomously opens the terminal and runs:
python manage.py test graph/tests/test_views.py
3. Automatic Self-Correction
It is rare for code to work perfectly the first time. Let's say the test fails because the view returned a 500 Error instead of a 404 for an invalid ORCID.
Without Antigravity: You would see the error, switch to the editor, fix the view, and re-run the test.
With Antigravity:
- The Agent sees the
AssertionErrorin the terminal. - It reads the stack trace.
- It switches back to
views.py, wraps the query in aget_object_or_404, and saves the file. - It re-runs the test.
- Green Check: It reports "All tests passed."
4. The Result: A Test Artifact
Finally, the agent presents you with a Test Results Artifact. This is a clean, structured summary card showing:
- ✅
test_get_researcher_success(Passed) - ✅
test_get_researcher_404(Passed) - ✅
test_unauthenticated_access(Passed)
Step 5: Verification and Review
The agent has built the feature and proved that the tests pass. Your final job is strategic oversight.
- Review the Agent's Code: Use the dedicated Review Pane to accept changes file-by-file. This ensures you retain final control over the codebase.
Conclusion
Google Antigravity is not just another IDE; it represents a fundamental shift towards agentic development.
By embracing this platform, you are transitioning from a reactive coder to a proactive orchestrator. The combination of the familiar VS Code environment, the intelligent safety controls of the Deny list, and the deep, codebase-aware planning powered by Gemini 3 Pro allows you to offload the most context-heavy, error-prone tasks.
This frees you to focus on the high-level architecture—like the design of the Researcher Profile—rather than the minutiae of file modification. Successfully leveraging Antigravity is about mastering the Artifact-Review-Proceed loop, allowing the agent to handle the execution while you maintain the strategic oversight.
Catch the latest version of this article over on Medium.com. Hit the button below to join our readers there.


