


How to Use Claude to Control Your Computer: A Step-by-Step Computer Use Tutorial
Hands-On Guide to Experiencing Claude’s Computer-Use Feature Without Any Coding Background
-

- •

Introduction
Claude 3.5 has introduced a significant update, with the most noteworthy feature being its “Computer Use” capability, allowing it to control a computer. The official release included several demonstration videos that have been quite impressive, garnering widespread media attention. For more details, you can refer to our article: New Claude 3.5 Can Control Computer: Outsmarts o1 in Coding and Redefines Agent Capabilities.
This article will guide you step-by-step on how to use and experience Claude’s ability to operate a computer. No programming or computer knowledge is required, making it perfectly suitable for beginners.
In this article, we’ll use Windows as an example, but the process is quite similar for Mac. Please note that using the Claude API may incur small charges.
From my personal experience, the current version is not as flawless as shown in the demonstration videos. In practice, it still feels like a “clumsy” prototype. However, witnessing it continuously attempt solutions based on my instructions, seeking and executing solutions on its own, was quite remarkable. It felt like watching a future giant taking its first steps.
Some online comparisons have been made between Claude and RPA (Robotic Process Automation). However, after experiencing it firsthand, you’ll notice the logic is entirely different. Claude’s Computer-Use feature involves formulating an action plan after receiving a task and adapting its thoughts, plans, and actions based on real-time screen changes. It can explore and experiment with unknown tasks proactively, whereas RPA focuses more on fixed process operations. This is a significant difference.
While Claude’s Computer-Use might not yet match the practicality of traditional RPA, we can foresee how it could profoundly impact our lives. Everyone could potentially have an incredibly intelligent superassistant in the future. This glimpse into future development suggests a world where perhaps working just one hour or not at all could become a reality.
In my experience, the current version has many limitations. It doesn’t directly control my computer but operates in a virtual environment with strict protocols, prohibiting downloading, using, or affecting any media.
1. Install Python
First, ensure that Python is installed on your computer:
- Click on the search bar, type “cmd,” and press Enter to open the command prompt.
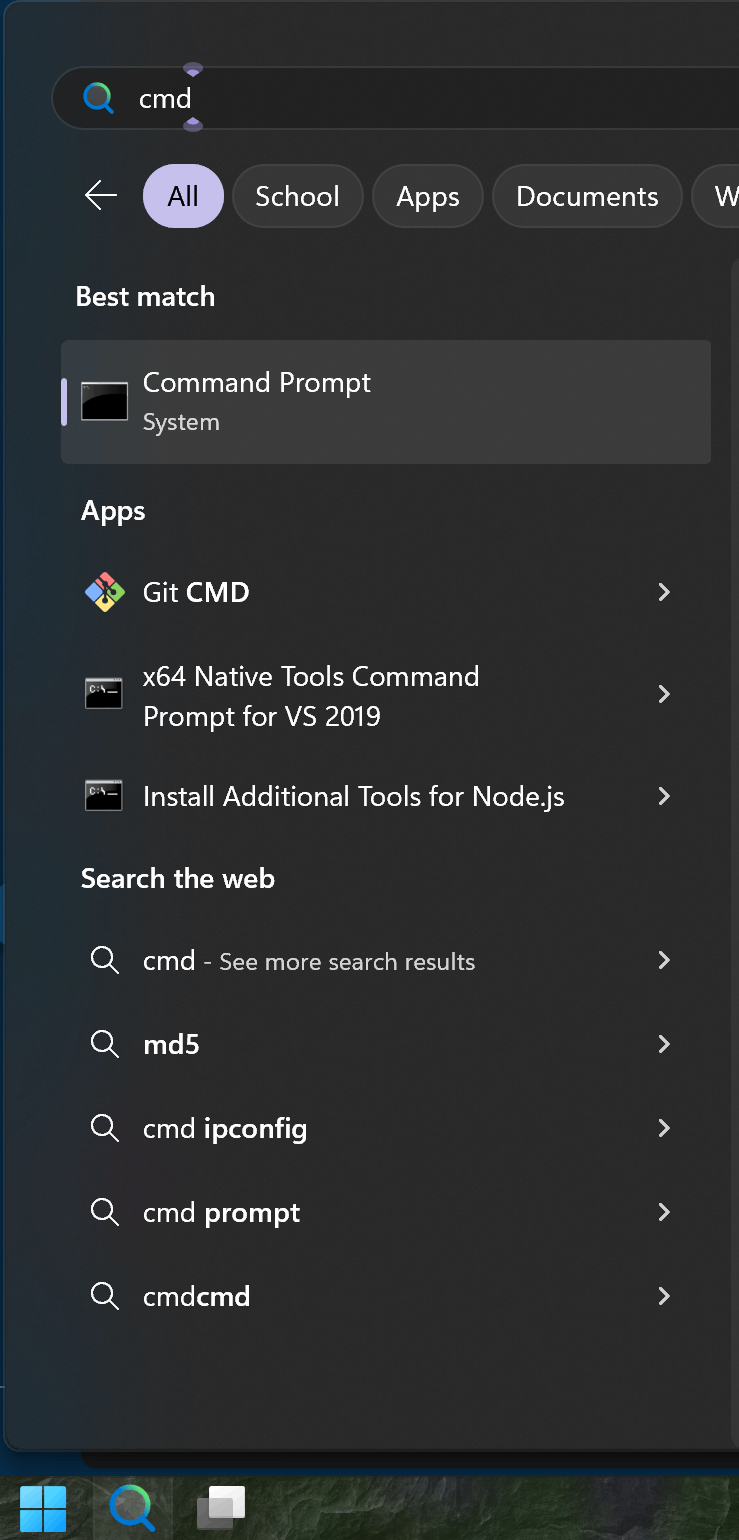
2. In the command prompt, paste the following command to check if Python is installed:
python --versionIf Python is installed, you will see the version number displayed. If not, you will need to install Python.
python --version3. Paste the following command to check if pip is installed:
pip --version
4. After entering both commands, verify the results:
- If both Python and pip are installed, you will see the version numbers displayed as shown in the image above. In this case, you can skip the installation step and proceed directly to “2. Deploy the Project.”
- If they are not installed, you will see an error message similar to the image below, indicating that you need to follow the installation steps.
5. To install Python, visit the official Python website to download it:
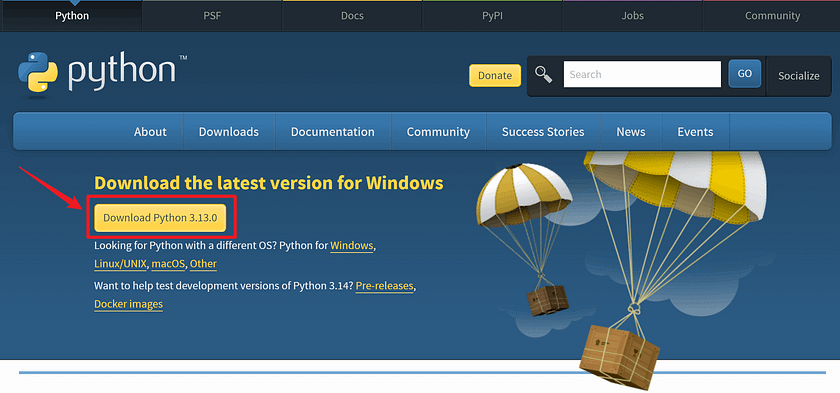
5.1 Python Installation Steps:
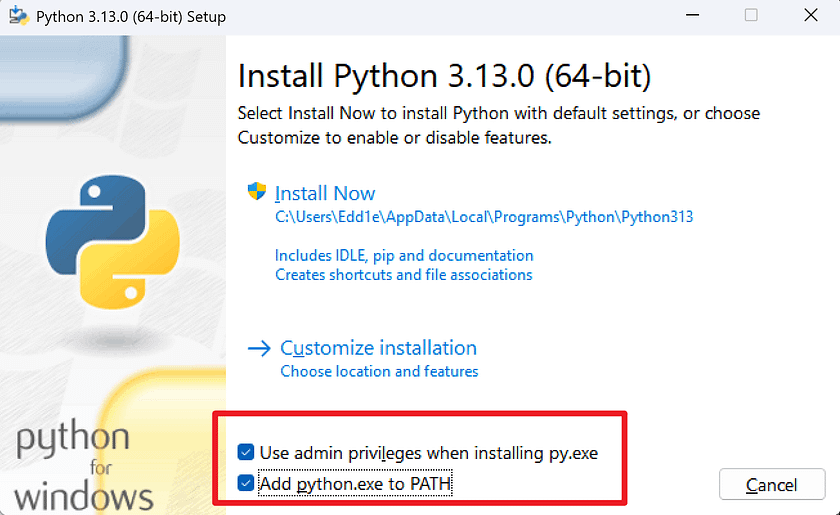
Run the installer you just downloaded. Make sure to check the option “Add Python to PATH” before clicking “Install Now.”
The installer is running, please wait for it to complete.

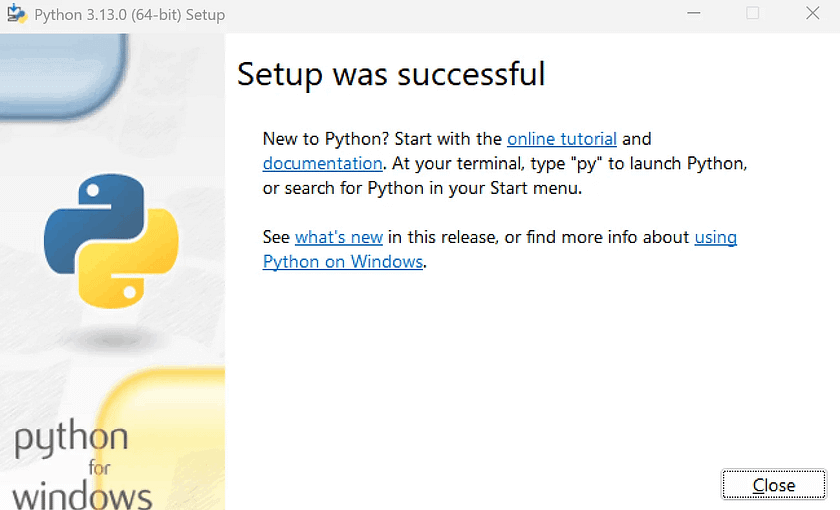
Seeing the word “successful” indicates that the installation is complete.
Run the commands from steps 2 and 3 again. At this point, you should see the version numbers displayed, indicating that the installation was successful.
2. Install Docker Desktop
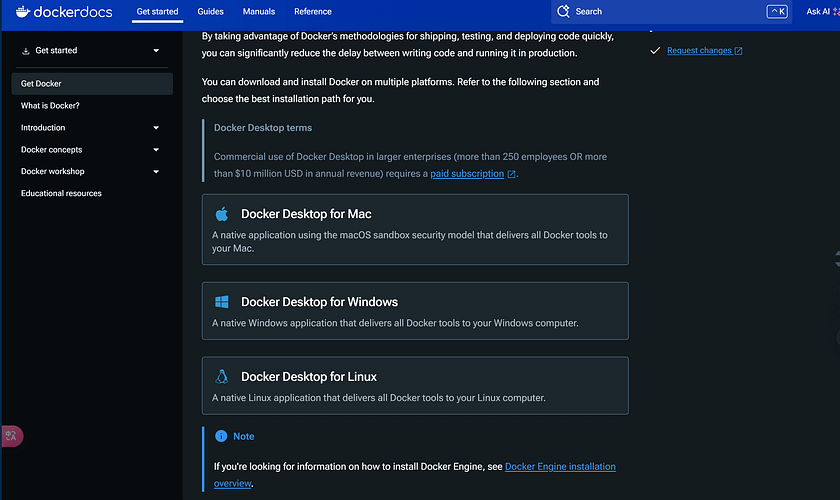
- Copy the following link to your browser to download Docker Desktop. Choose the version that matches your operating system: Docker Download
Here, I’ll use Windows as an example for downloading and installing Docker Desktop.

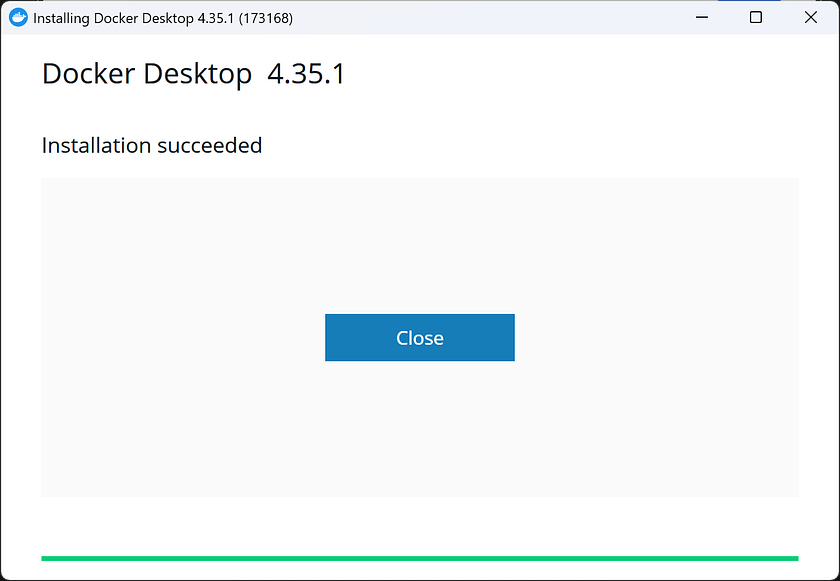
2. After downloading, run the downloaded file and click “OK” to start loading the files.

3. Click “Close” to complete the installation (a restart may be required).
4. Launch Docker Desktop. You can choose to log in or skip this step; it won’t affect the functionality.
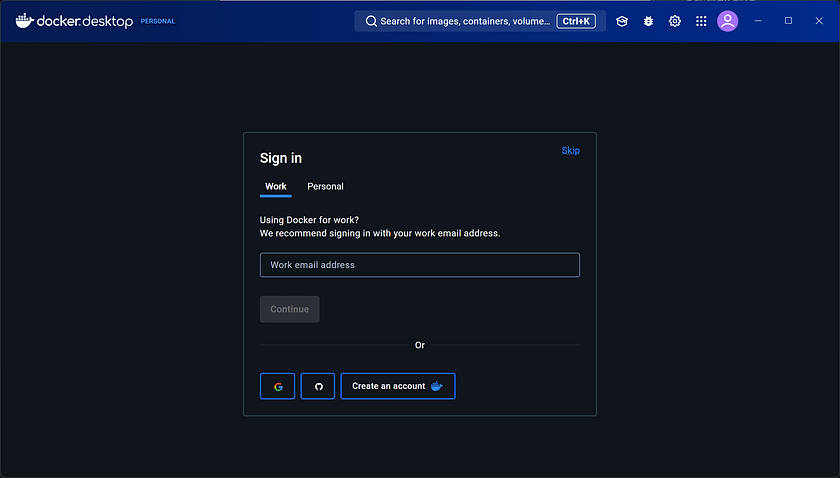
5. You will then enter Docker Desktop. This concludes the setup process.

3. Deploying the computer-use-demo Project
- Create a new directory in an appropriate location for downloading the project. Then, Shift + right-click and select “Powershell.”

2. Paste the command and press Enter:
git clone https://github.com/anthropics/anthropic-quickstarts.git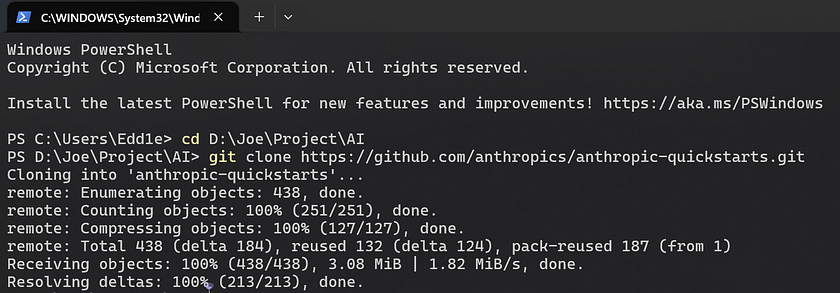
2. Once the download is complete, open the anthropic-quickstarts folder and navigate to the computer-use-demo directory.
cd .\anthropic-quickstarts\computer-use-demo\3. Run the following command to install dependencies:
pip install -r dev-requirements.txt
Wait for the download to complete.
4. Start the Docker container.
docker run -v ${env:USERPROFILE}\.anthropic:/home/computeruse/.anthropic -p 5900:5900 -p 8501:8501 -p 6080:6080 -p 8080:8080 -it ghcr.io/anthropics/anthropic-quickstarts:computer-use-demo-latestThis command runs the anthropic-quickstarts:computer-use-demo-latest container using Docker, mapping local directories and multiple ports for data sharing and service access. Here’s what each part does:
v: Mounts the${env:USERPROFILE}\\.anthropicdirectory from the host to the/home/computeruse/.anthropicpath inside the container for file sharing.p: Maps the host ports (5900, 8501, 6080, 8080) to the corresponding ports inside the container, allowing the host to access services within the container.it: Starts the container in interactive mode and allocates a pseudo-terminal.ghcr.io/anthropics/anthropic-quickstarts:computer-use-demo-latest: Specifies the image name and tag pulled from the GitHub Container Registry.
Wait for the download to complete. You will see the following image upon successful completion.
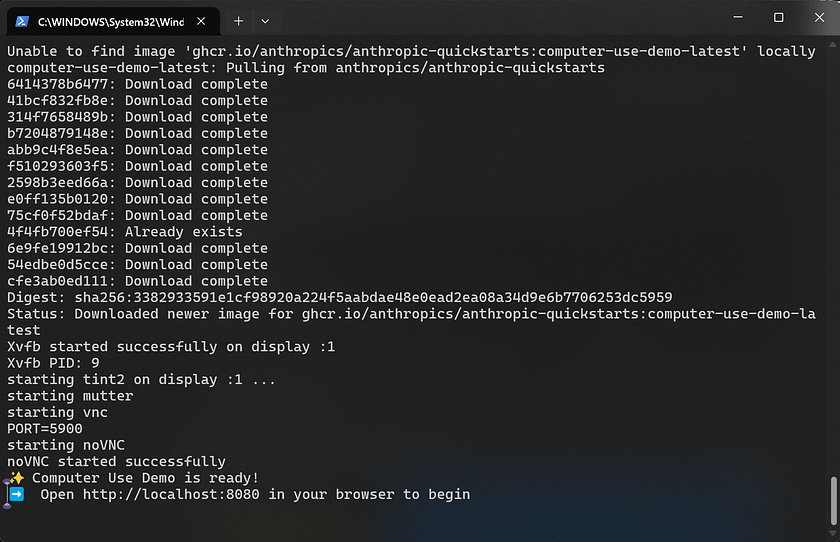
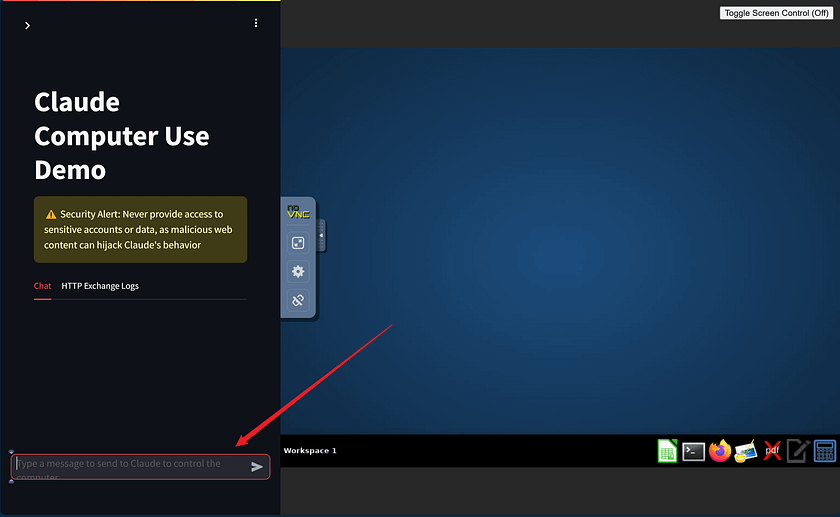
5. Open your browser and enter http://localhost:8080/
You will see the following screen, then click the top left corner to open the settings.

6. Enter your “API Key” and press Enter to start a conversation on the Chat page.

You can obtain the Anthropic API Key at https://console.anthropic.com/settings/keys
You’re all set! Enjoy your experience!
4. User Experience
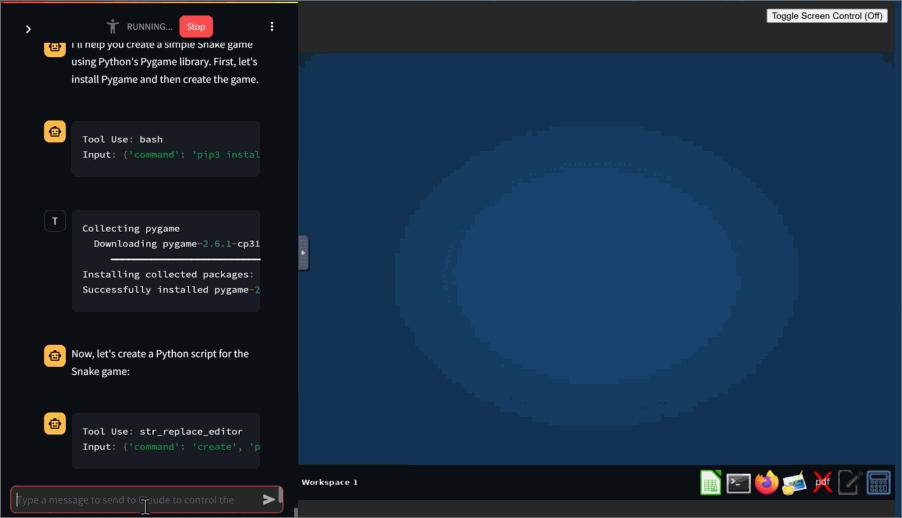
I will perform a simple test with a programming and web browsing command.
“Write a python snake game and run it.”
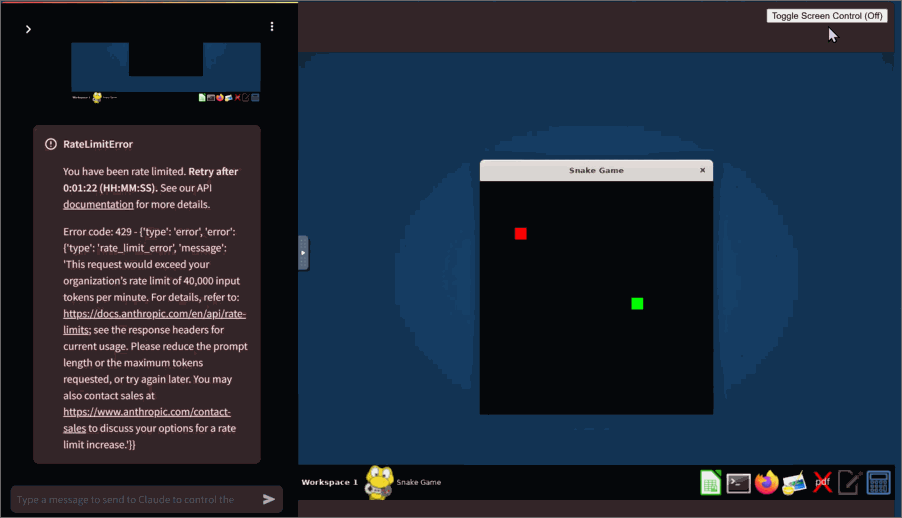
Claude successfully wrote and launched a snake game for us.
After testing, the game runs smoothly and is fully playable.
“Browse recent AI news and create a new document on your desktop to write a news summary, open it for me.”
Claude successfully searched for news on Google, created a new document using Gedit, and entered the summary as requested.

Conclusion
This tutorial demonstrates the remarkable capabilities of Claude’s Computer-Use feature, showcasing its potential to interact with virtual environments and execute tasks based on user instructions. While it remains a prototype with limitations, such as its operation within a controlled sandbox and the absence of direct system control, the feature offers a glimpse into a future where AI assistants could perform complex, dynamic tasks with minimal human input. By following this guide, even beginners can experience the integration of cutting-edge AI into practical scenarios, laying the groundwork for a transformative digital era.
References
- anthropics (2024). anthropic-quickstarts/computer-use-demo at main · anthropics/anthropic-quickstarts. https://github.com/anthropics/anthropic-quickstarts/tree/main/computer-use-demo.
Catch the latest version of this article over on Medium.com. Hit the button below to join our readers there.


